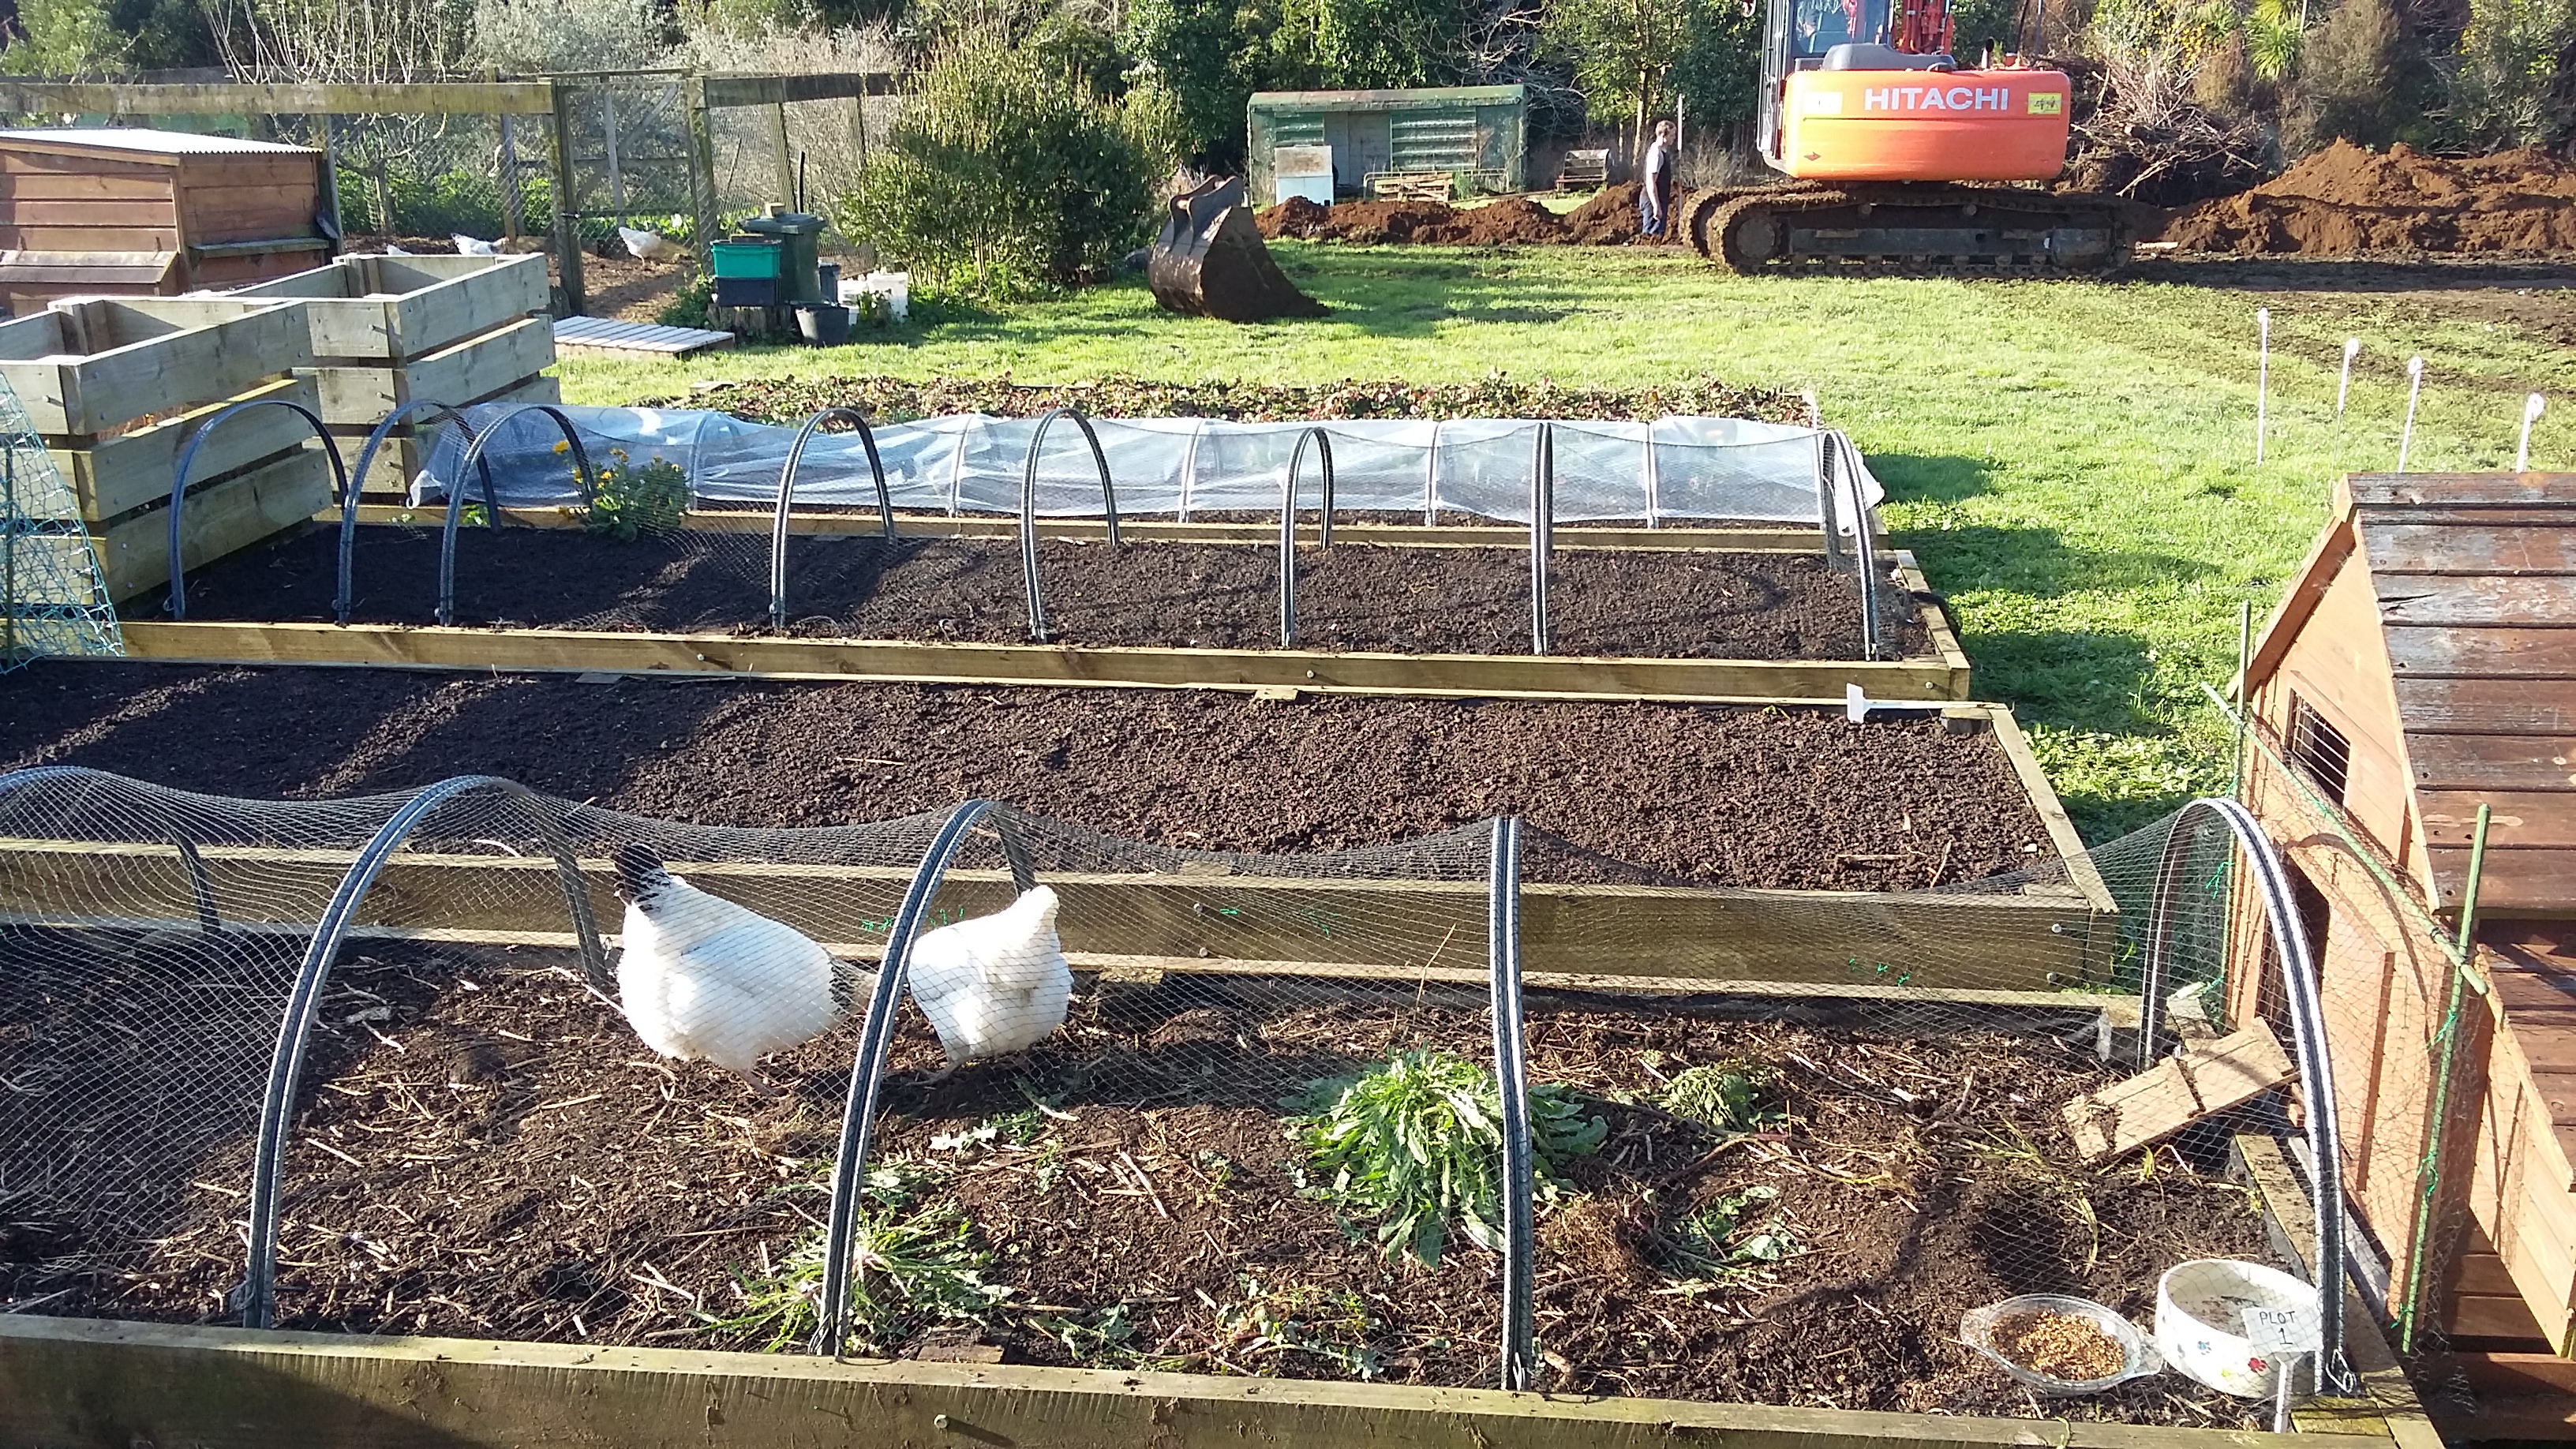
It’s ok, they are supposed to be there. They are cleaning up and fertilising the bed for me before I plant my seedlings. Normally they are not allowed anywhere near my vege garden, as their happy diggings make for a very unhappy mumma bear. But, in this case they are contained so its ok. They will stay there for a couple of weeks and then they will either go on to another bed or they will go back with their friends in the big pen. “That’s a relief” I hear you say. Because you know the saying, “happy wife, happy life”? It’s very true 🙂
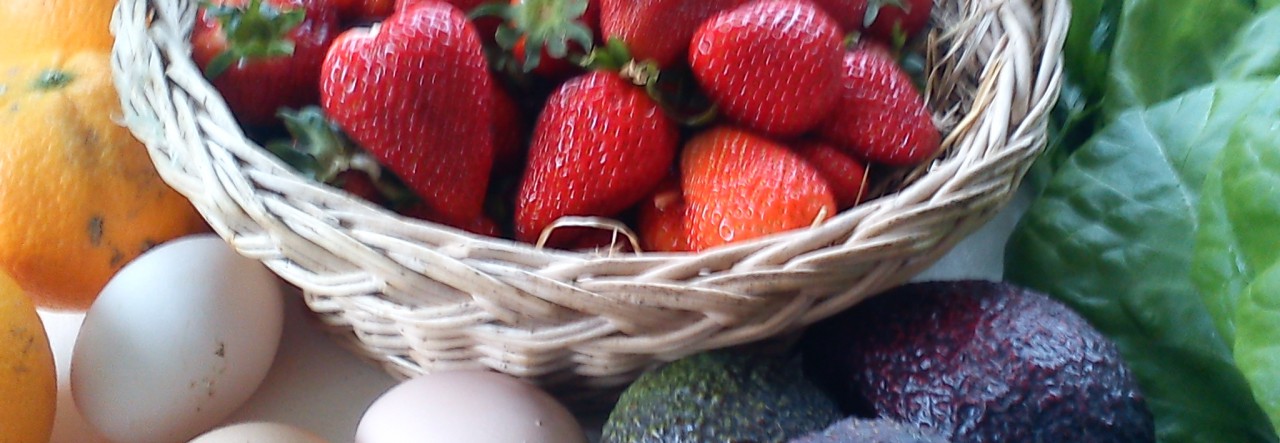
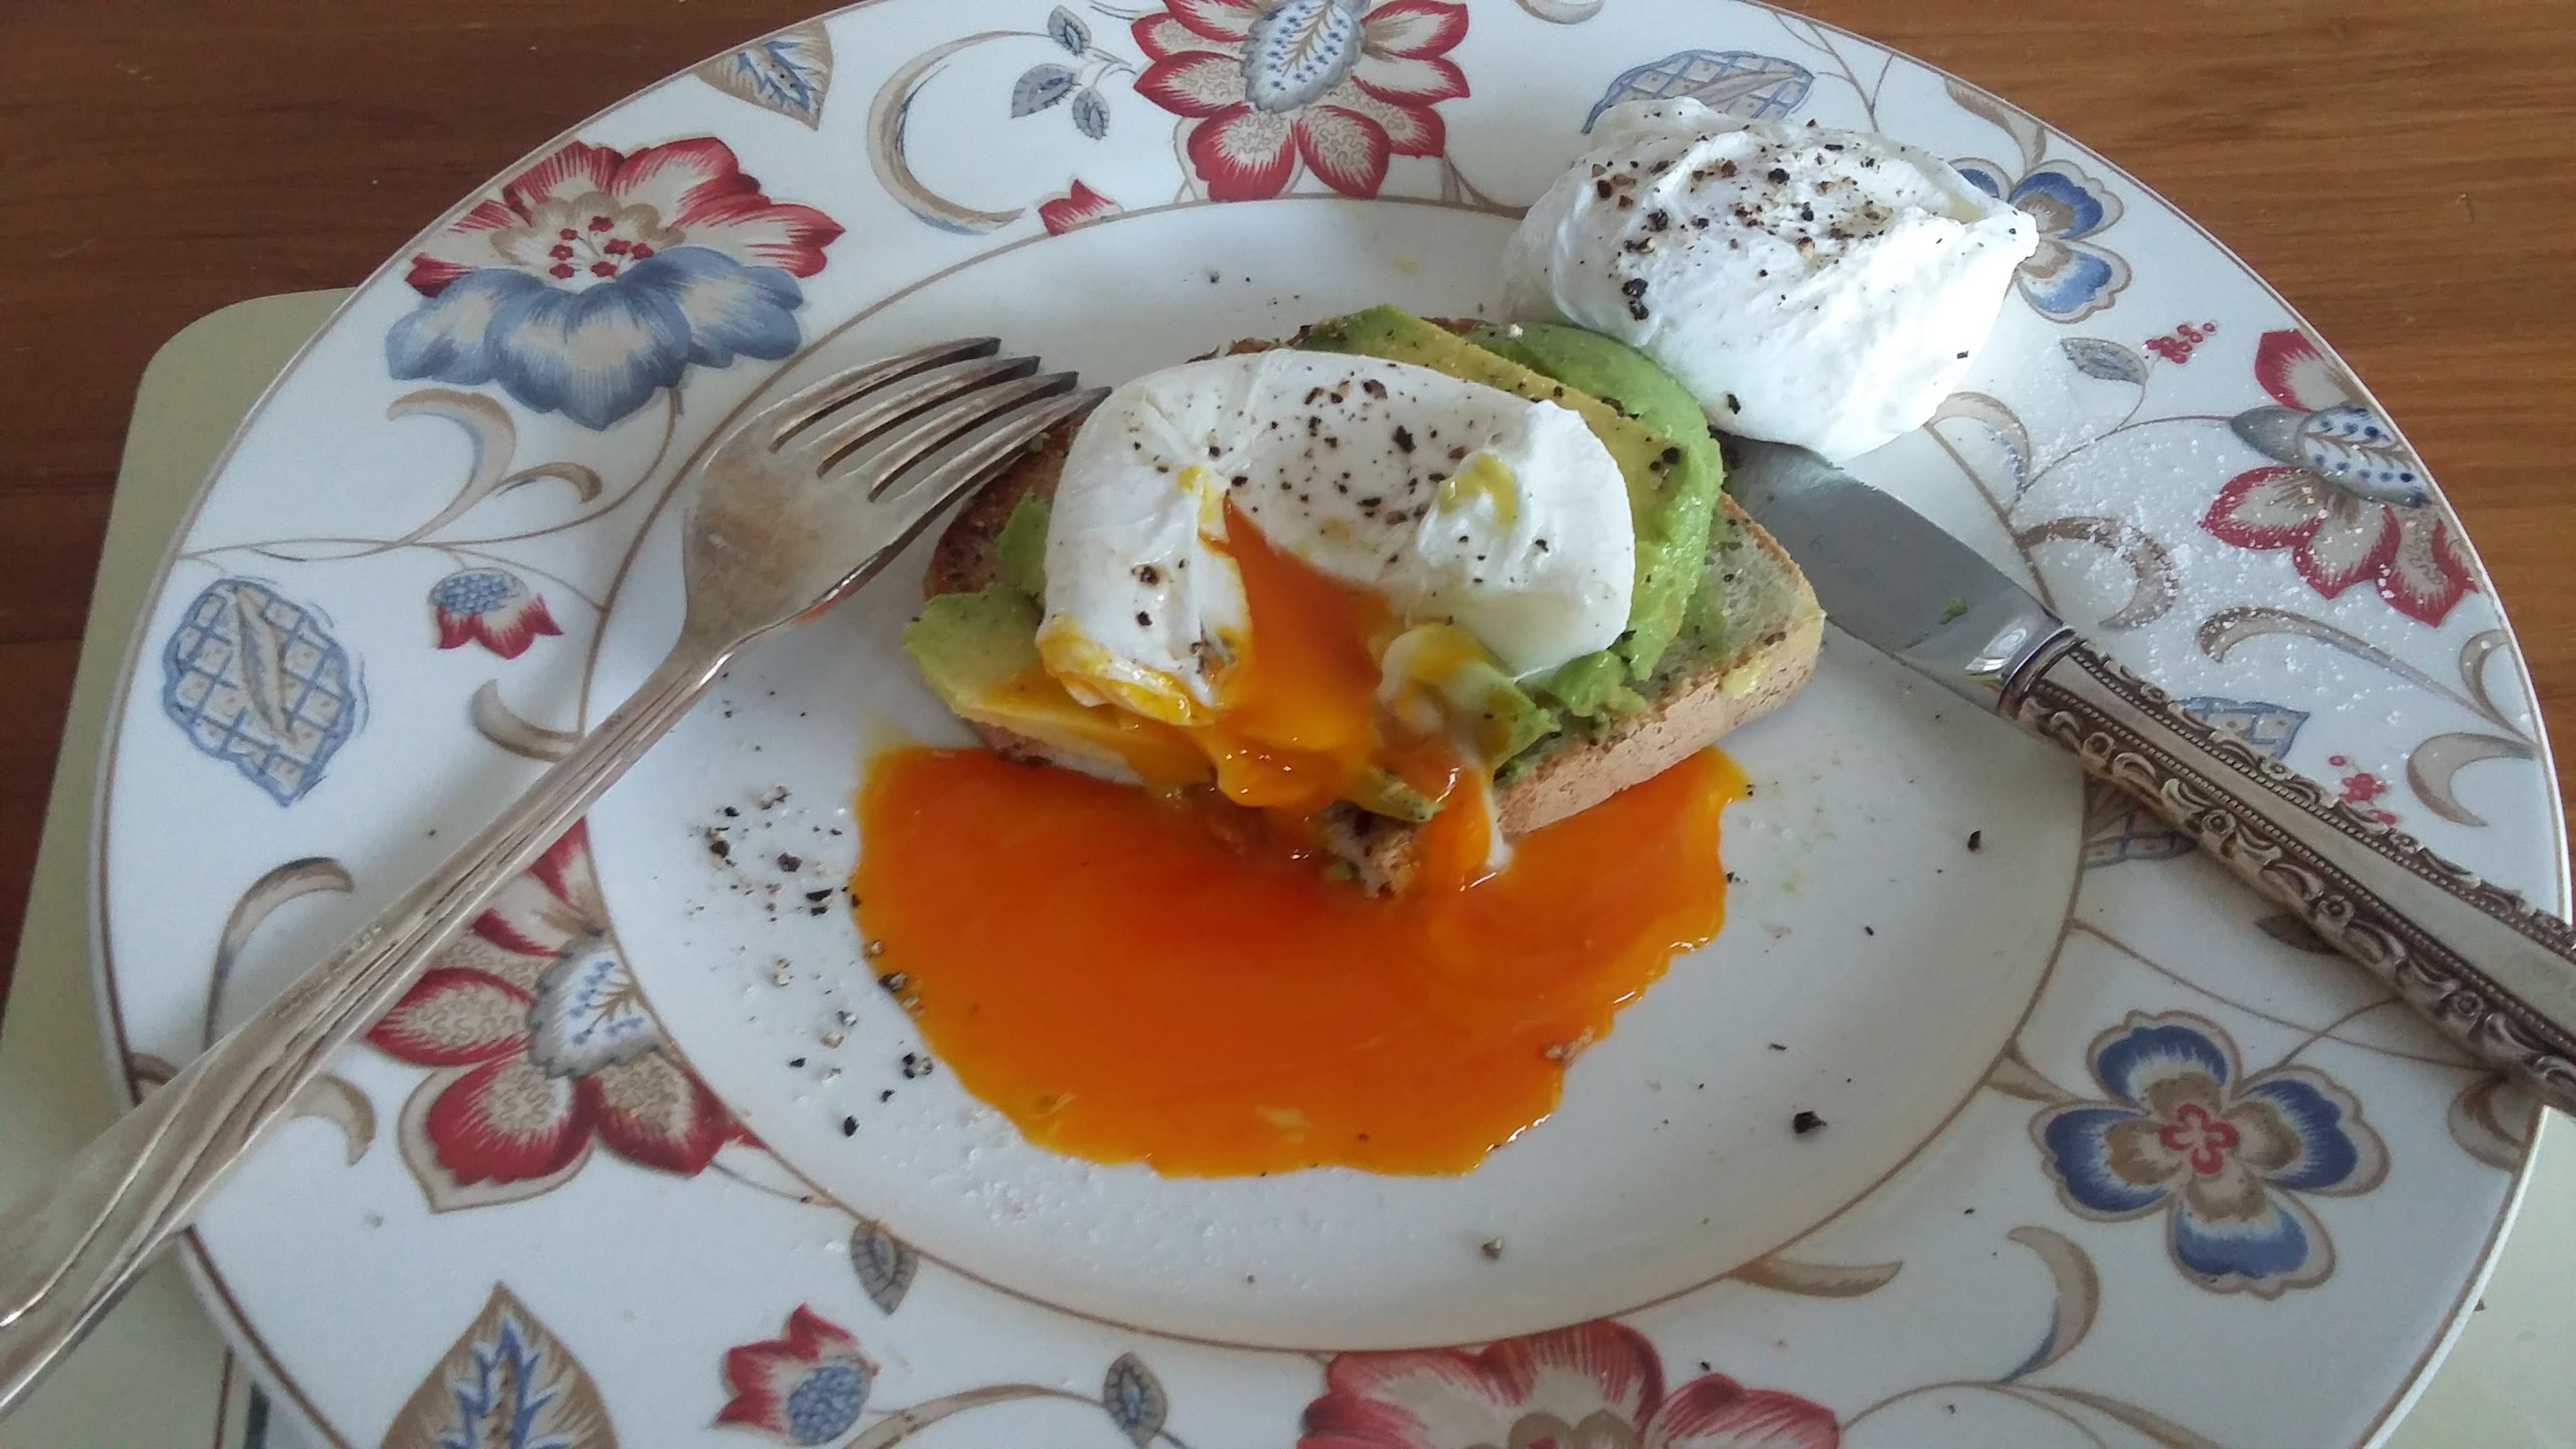
I chuck in all of my food scraps for them, and also fresh greens every day (usually puha or silverbeet), and this is the colour of their yolks. Pretty damn healthy I would say.
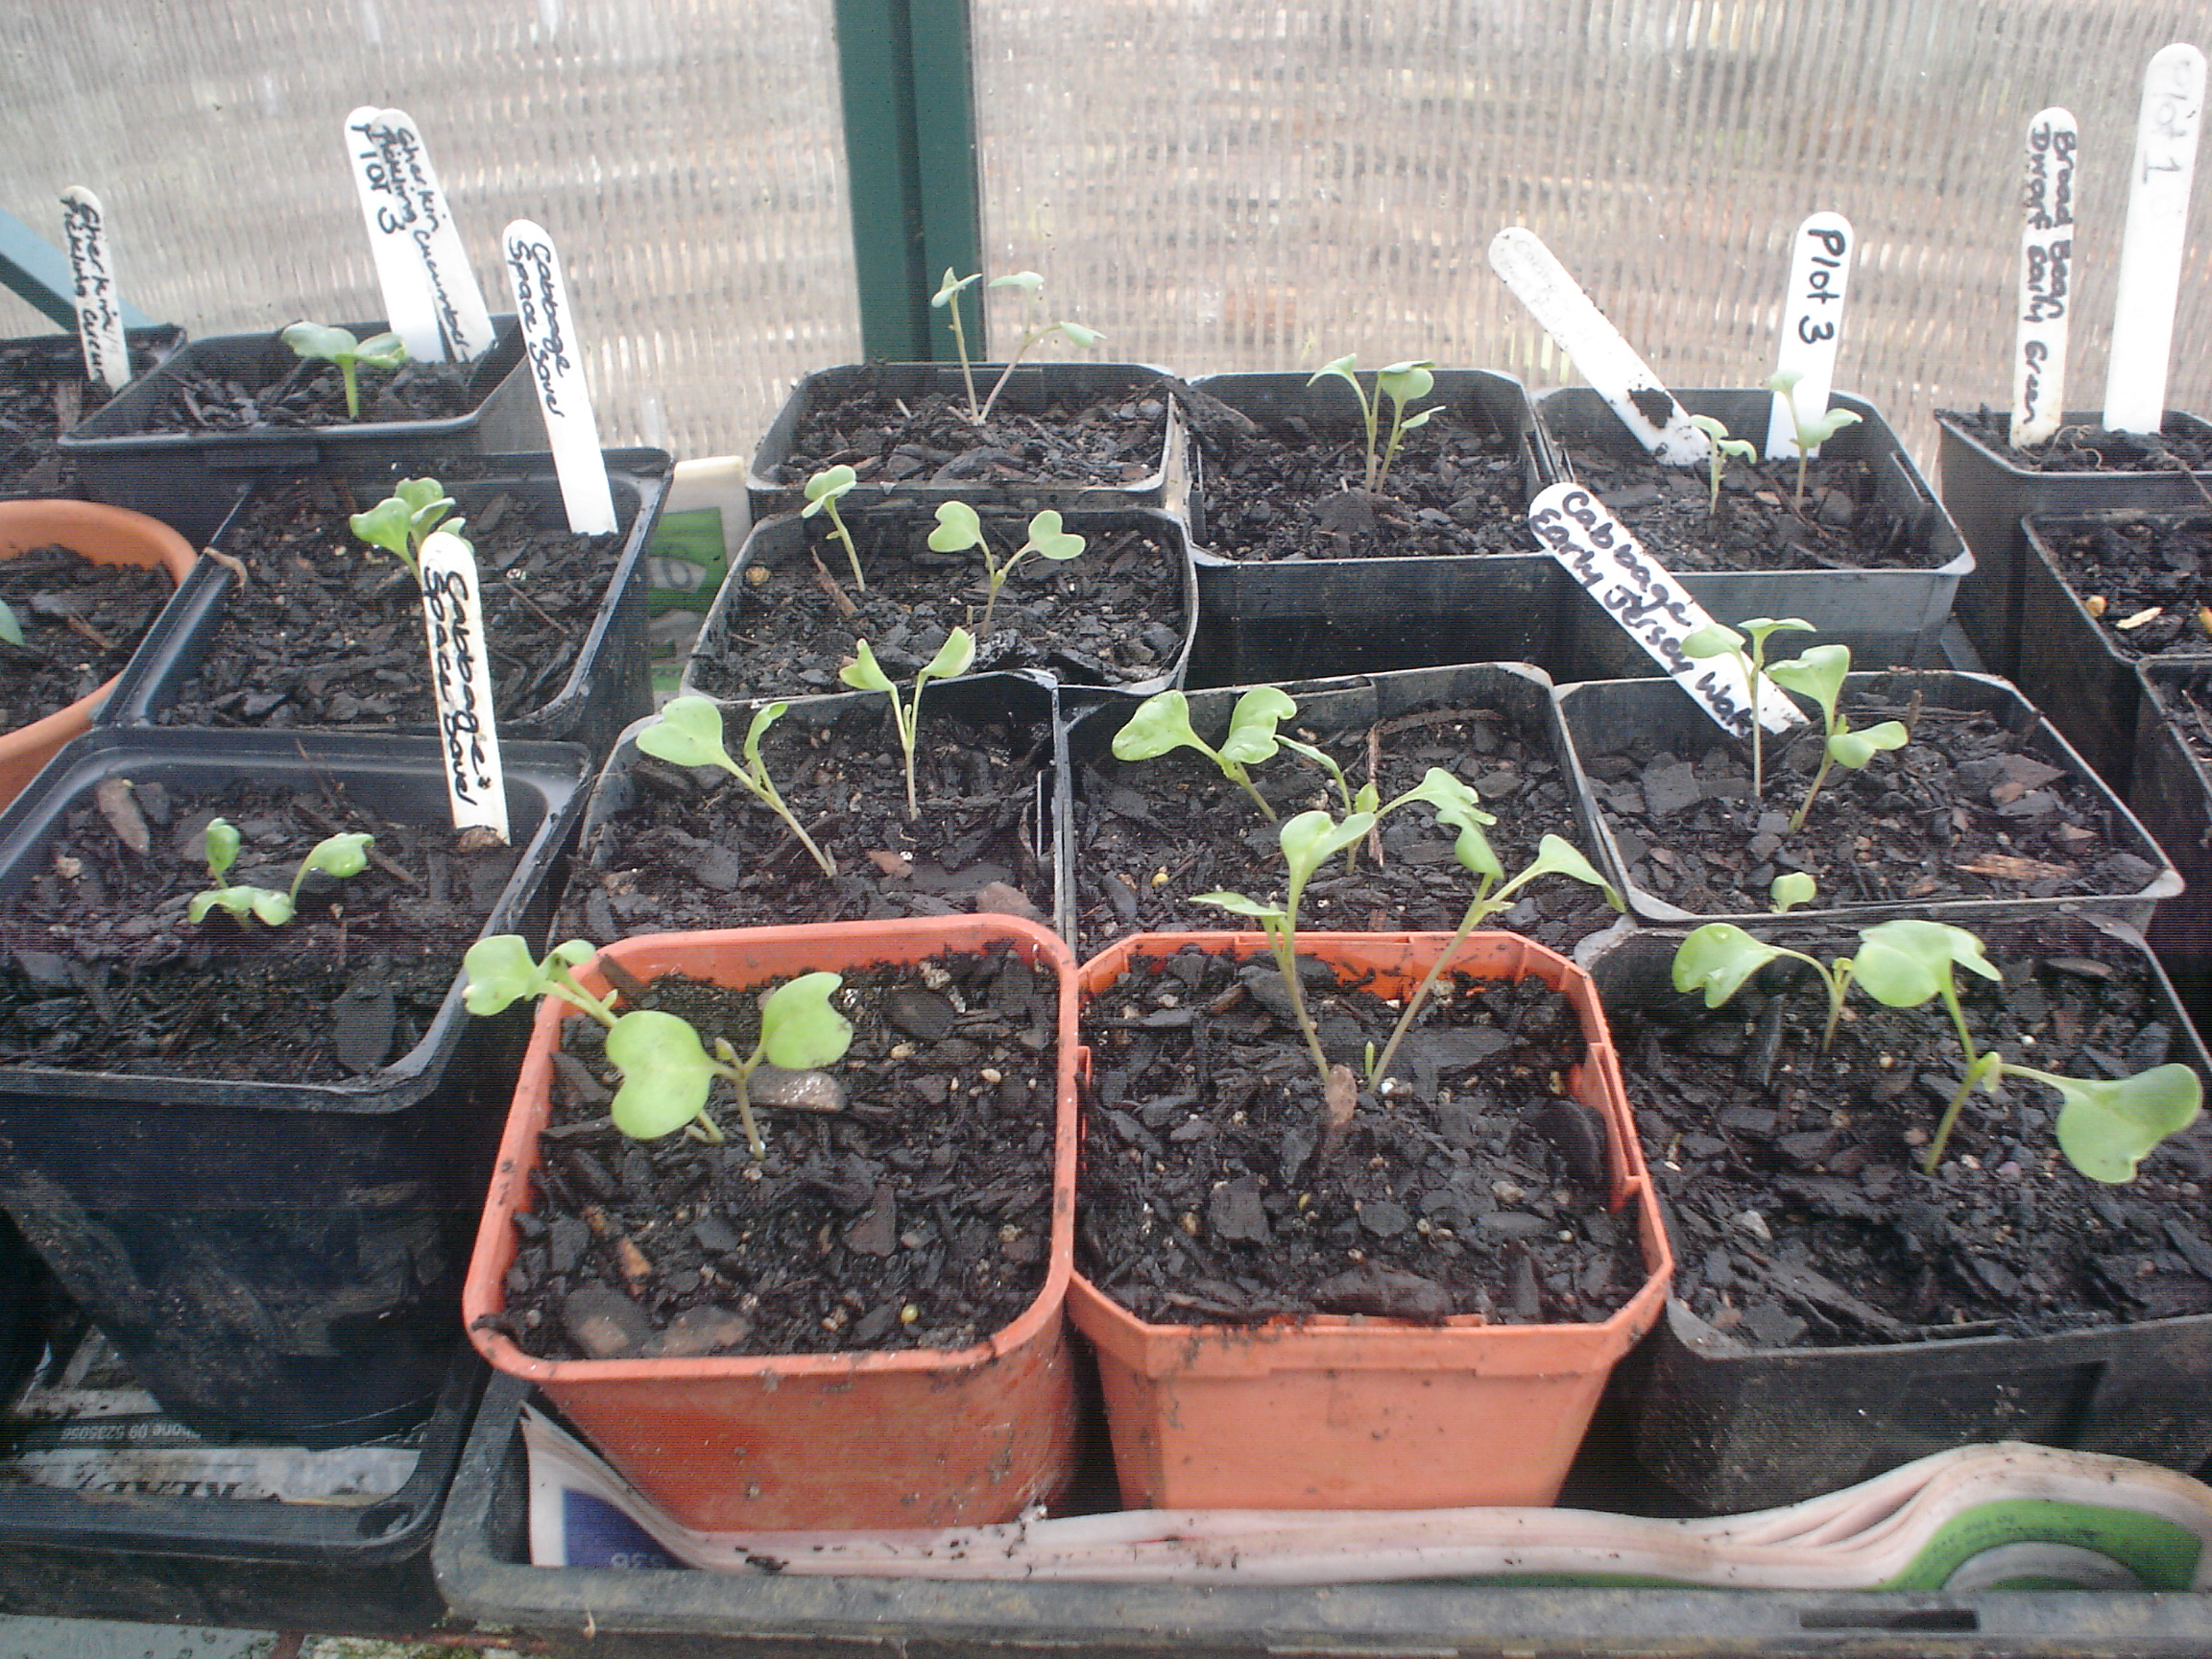
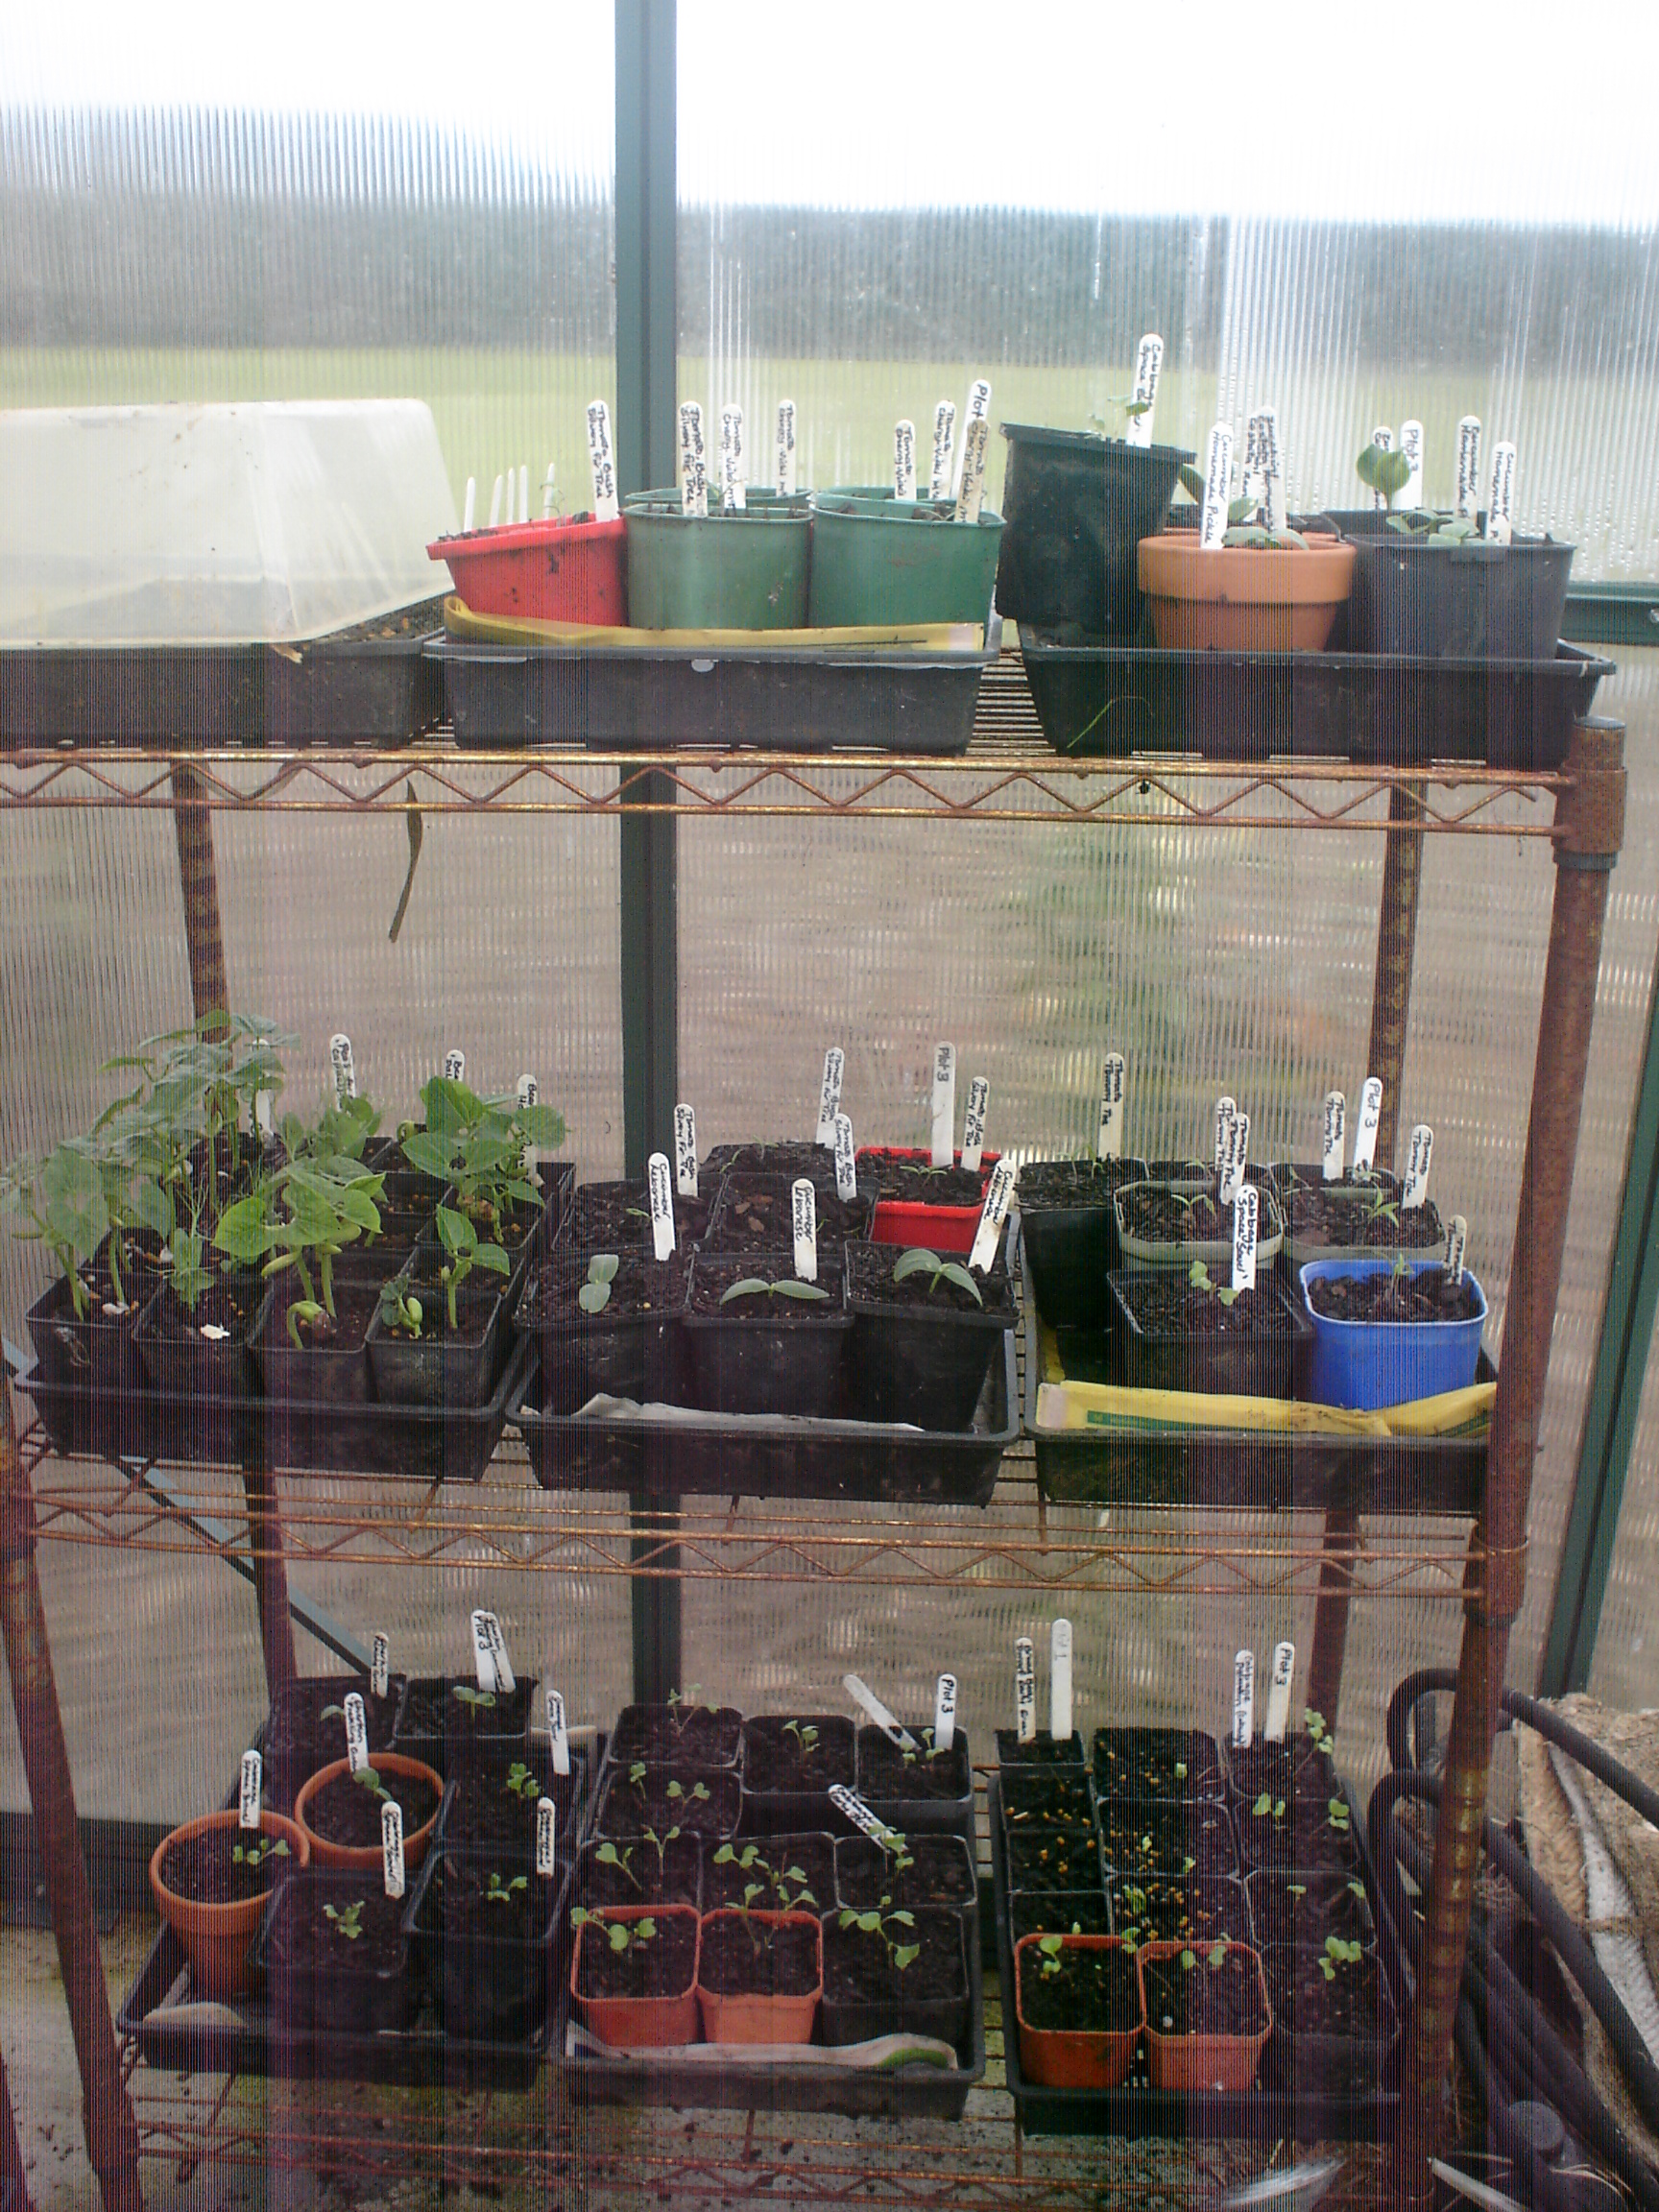
So my seedlings are coming along nicely. I am starting to plant out some of them now, and they are looking really good and healthy. I grow all of my veges from seed, that way I know that they have been grown organically and fungicide free. When I prick the seedlings out into pots I always use organic potting mix, and put a few pellets of organic ‘biogold’ or ‘dynamic lifter’ in to feed them while they are potted up. I prepare my beds carefully with compost and environmental fertilisers ‘natures garden’ fertiliser. Sometimes sheep pellets too. And when I plant them into the garden, they get some more biogold pellets under their roots, a sprinkle of ‘natures garden’ at 100g per square metre, and a foliar feed of environmental fertilisers ‘fish plus’. I follow ‘Koanga Institute’ guidelines, put out by Kay Baxter, when it comes to crop rotation, bed preparation and vege care, and have found that my veges grow really well and very nutrient dense.
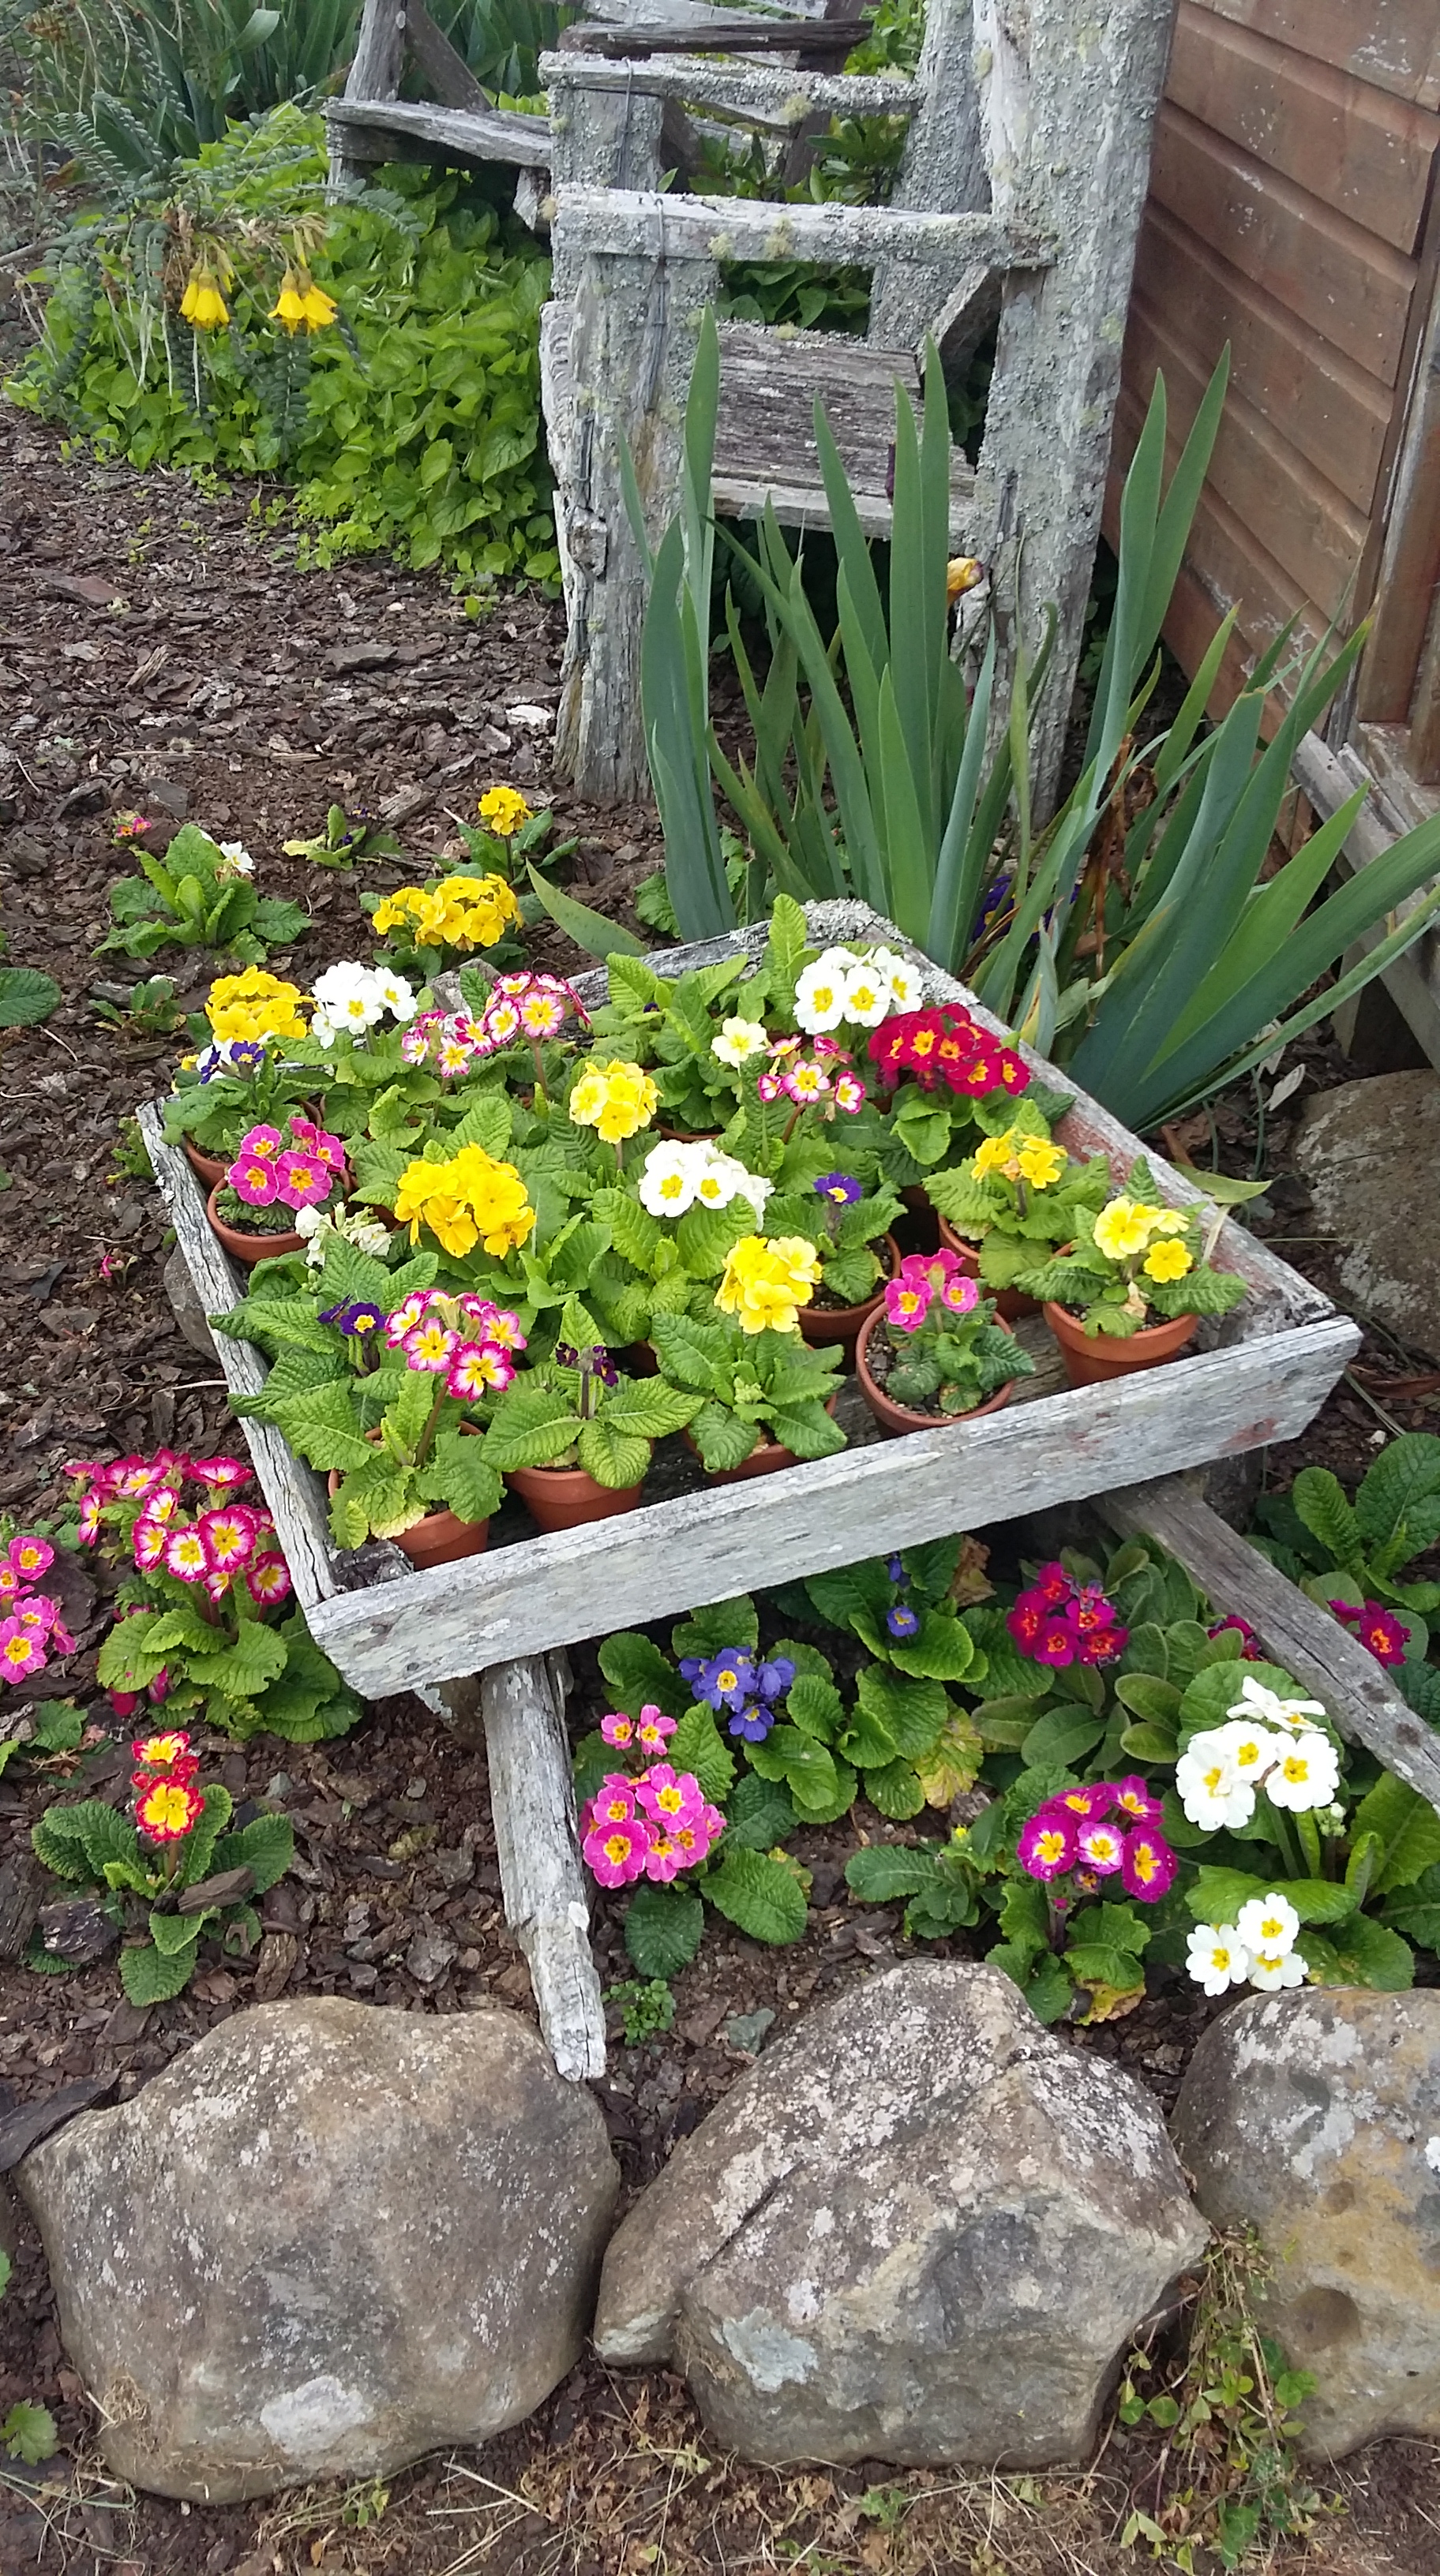
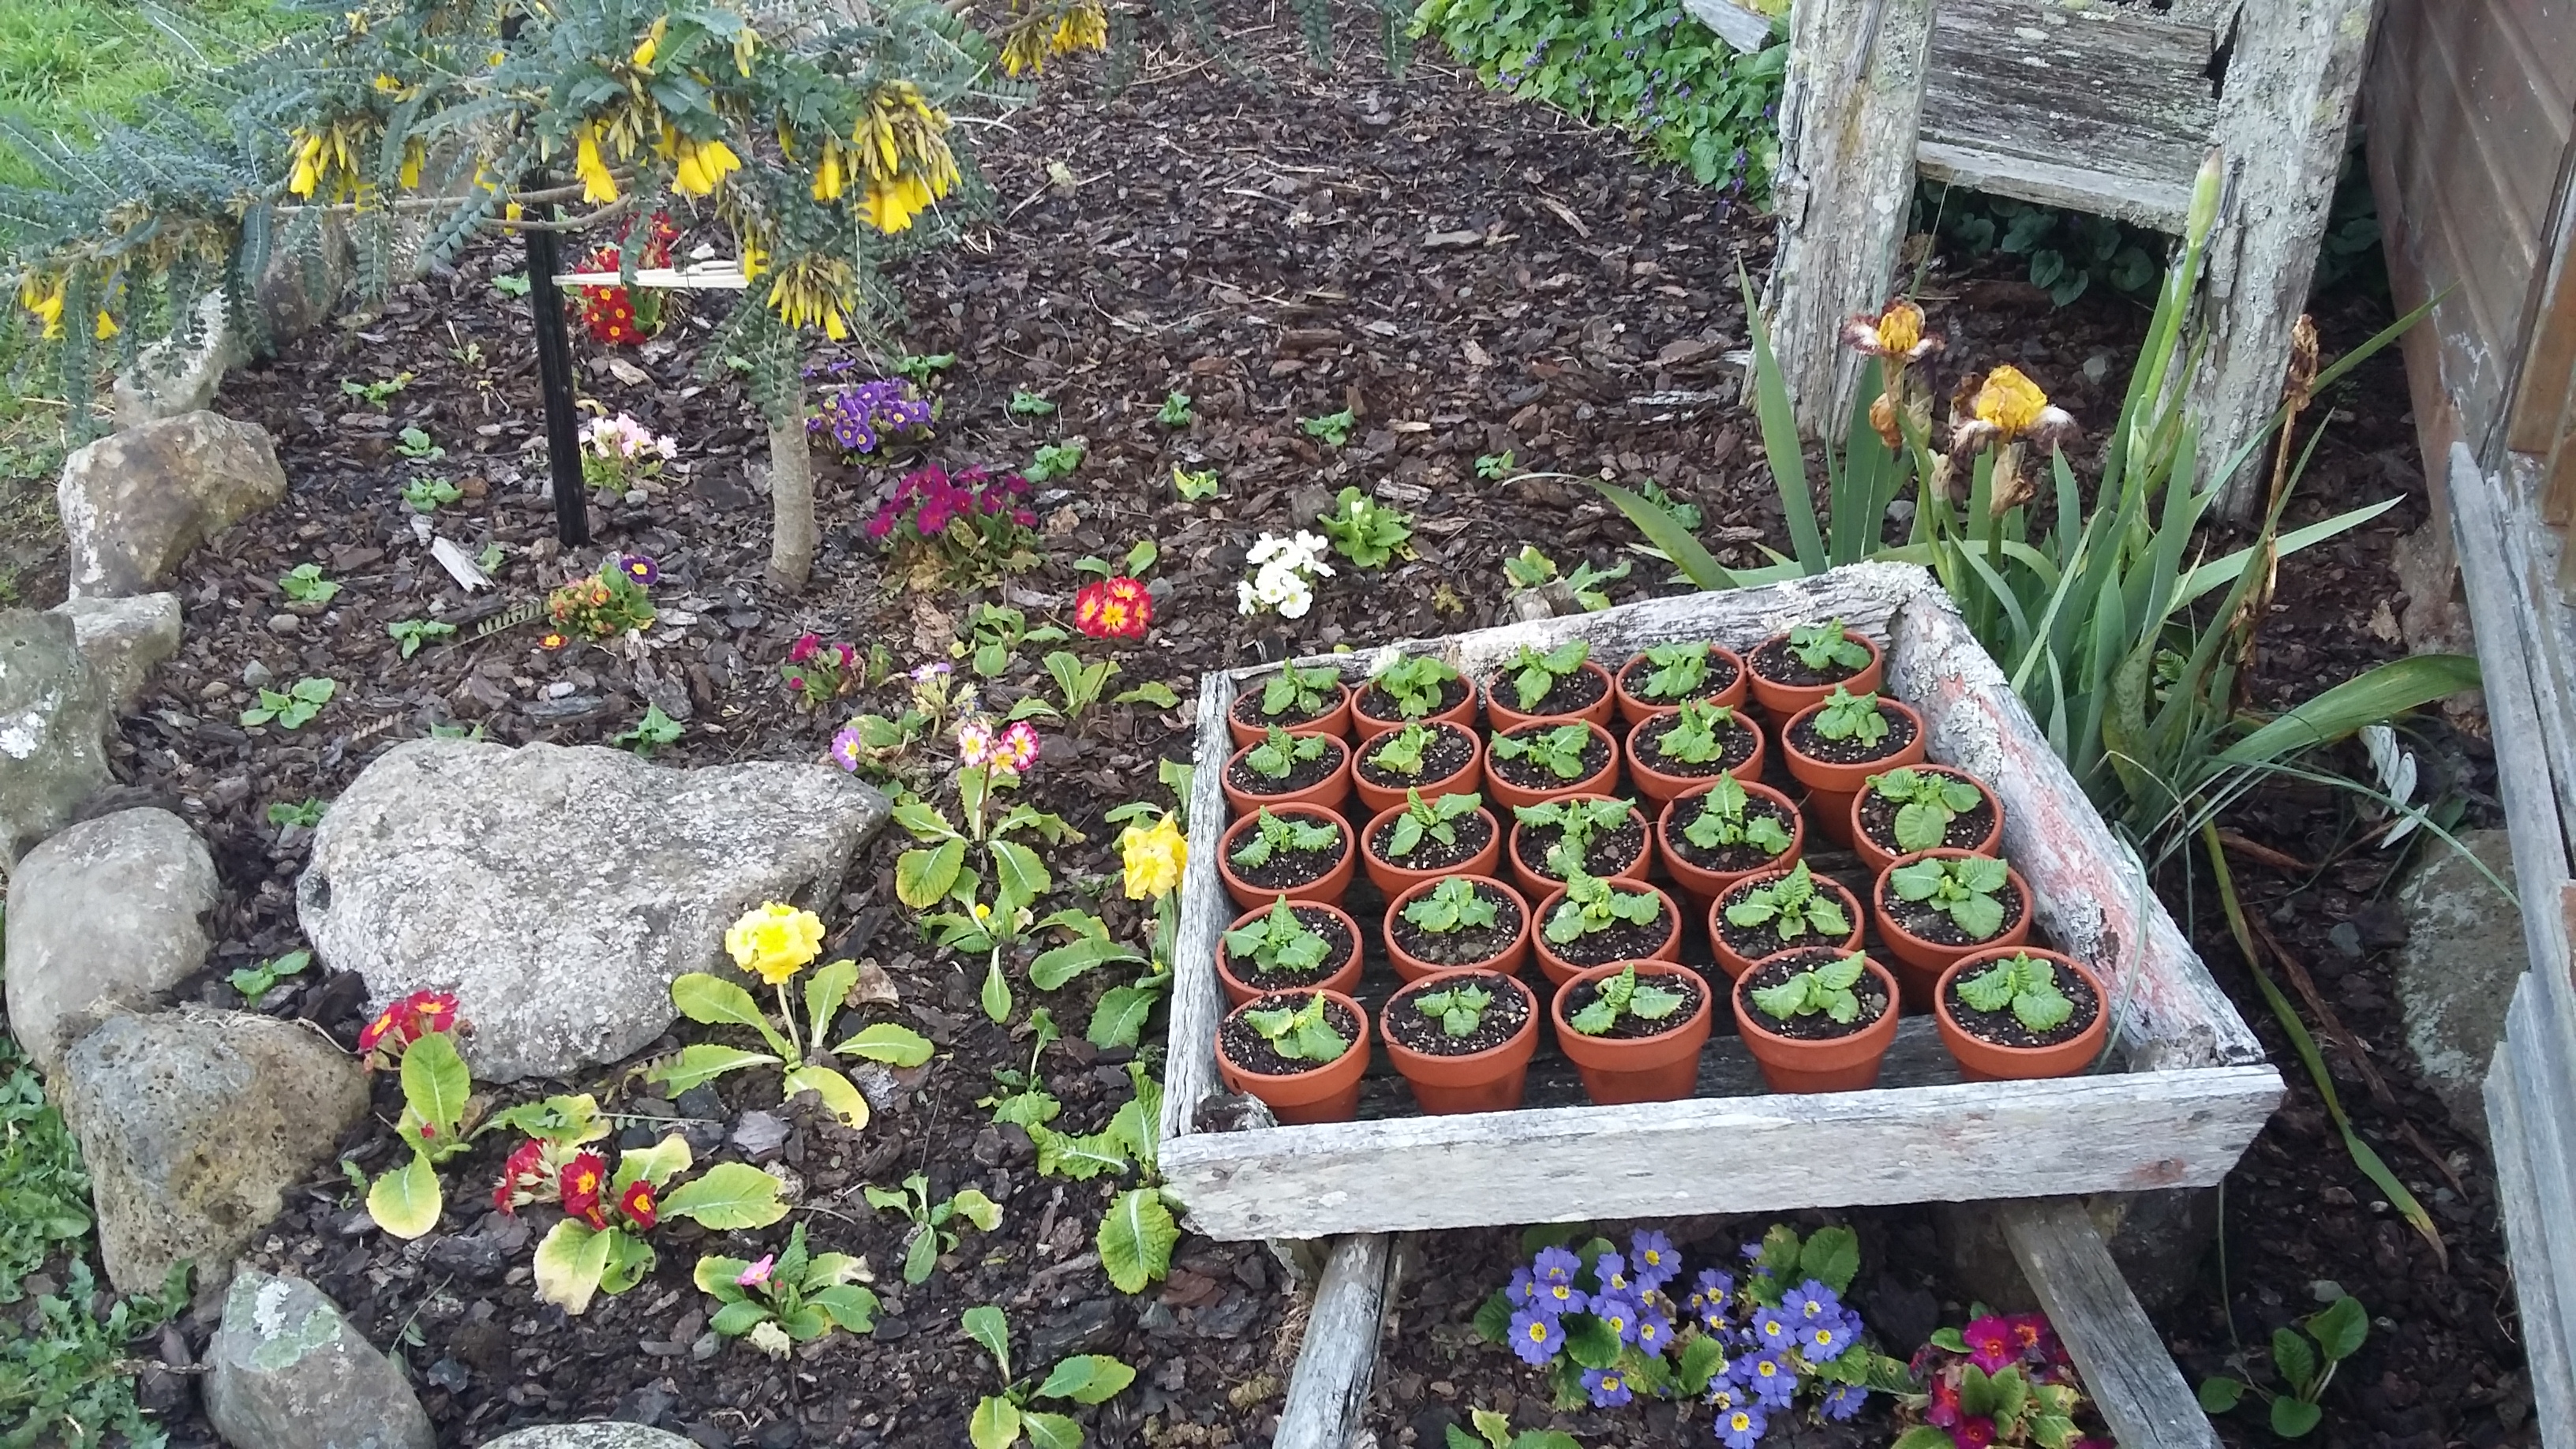
I’m back :)) At last I can sit down at the computer without having to think about unpacking and cleaning and putting up pictures etc etc. We have finally shifted into our new house that has taken so long to build. And I love it. But I haven’t just been doing shifting stuff. I have still been in the garden and looking after my chookies and cooking. I have been taking photos but just haven’t had the time to put them on here. But, I’m hoping that things will slow up a bit and I will be able to. That’s after the spring garden is put in, and the new beds have been dug…………sigh……..so much to do. But anyway, I put these polyanthus in pots a while ago in an old wooden wheelbarrow and this is what they are looking like now (top photo). I’m so happy with them. I have been watering them regularly and feeding them weekly with a fish fertiliser, and this is how they reward me :)).
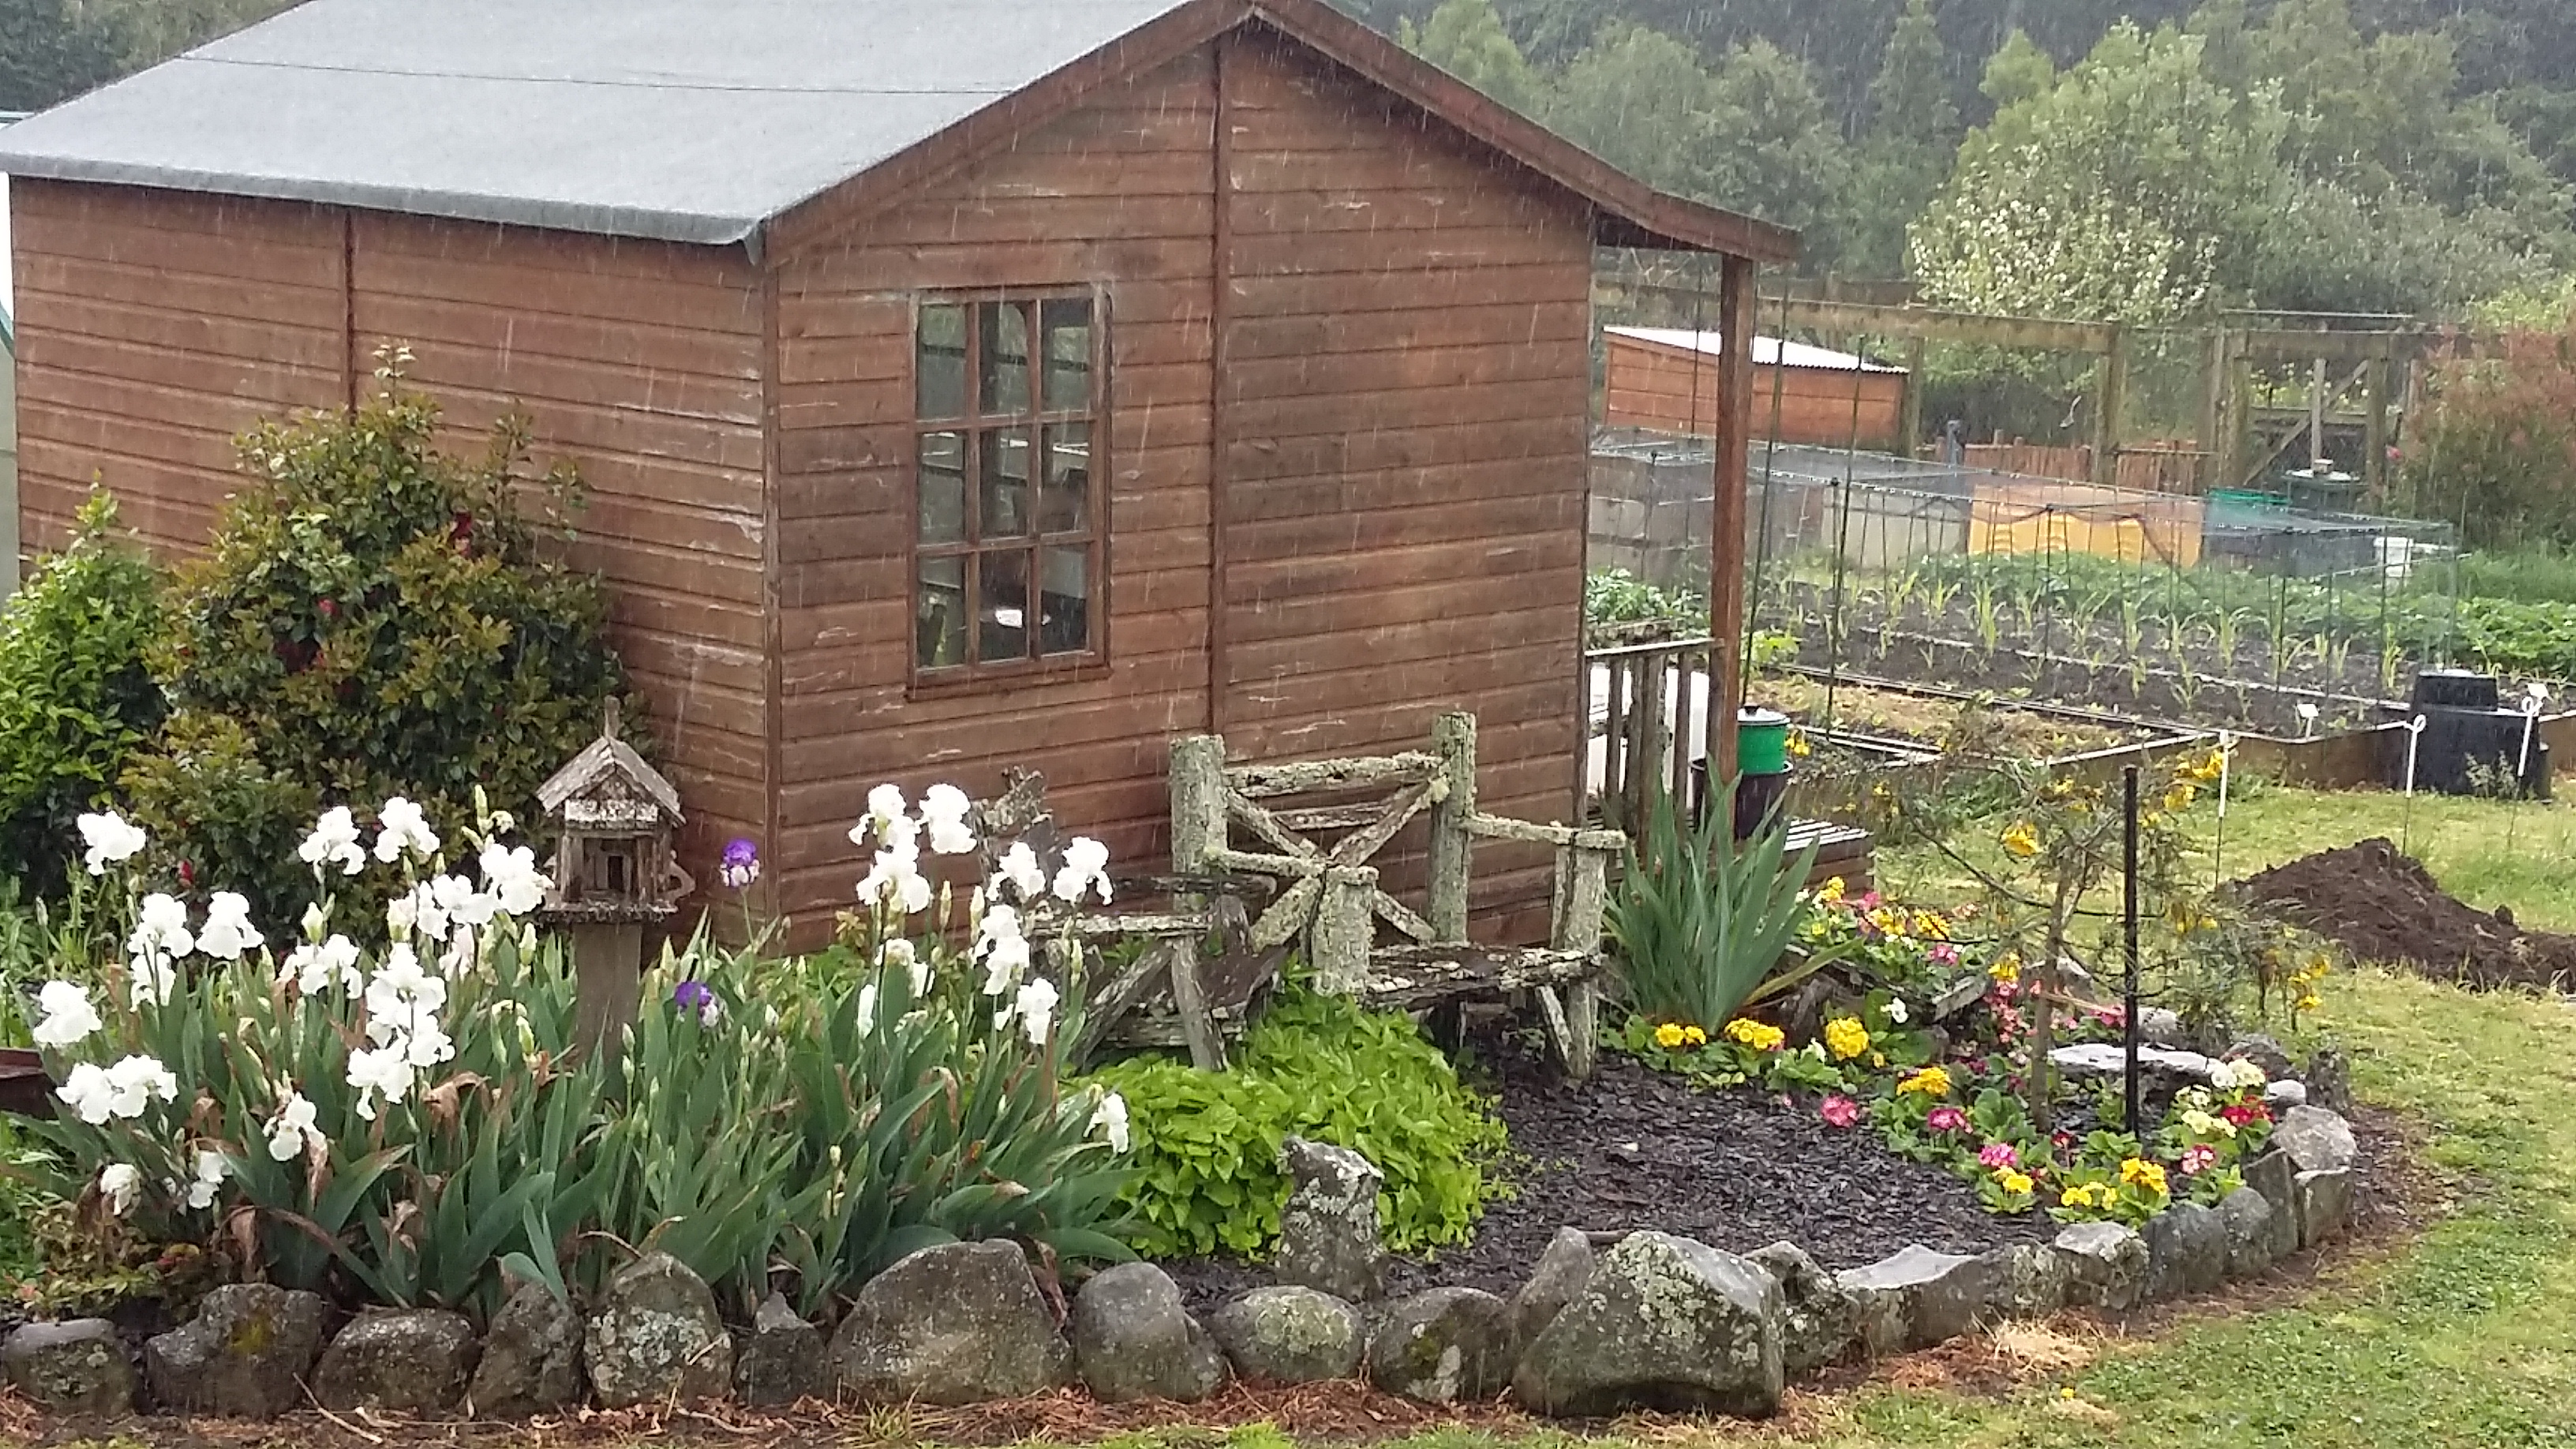
We bought this property 8 years ago, so I have had all that time to put in the gardens and chookpen and home orchard etc, all the while dreaming about my little cottage. I’ll give you photos of the new house on another blog.
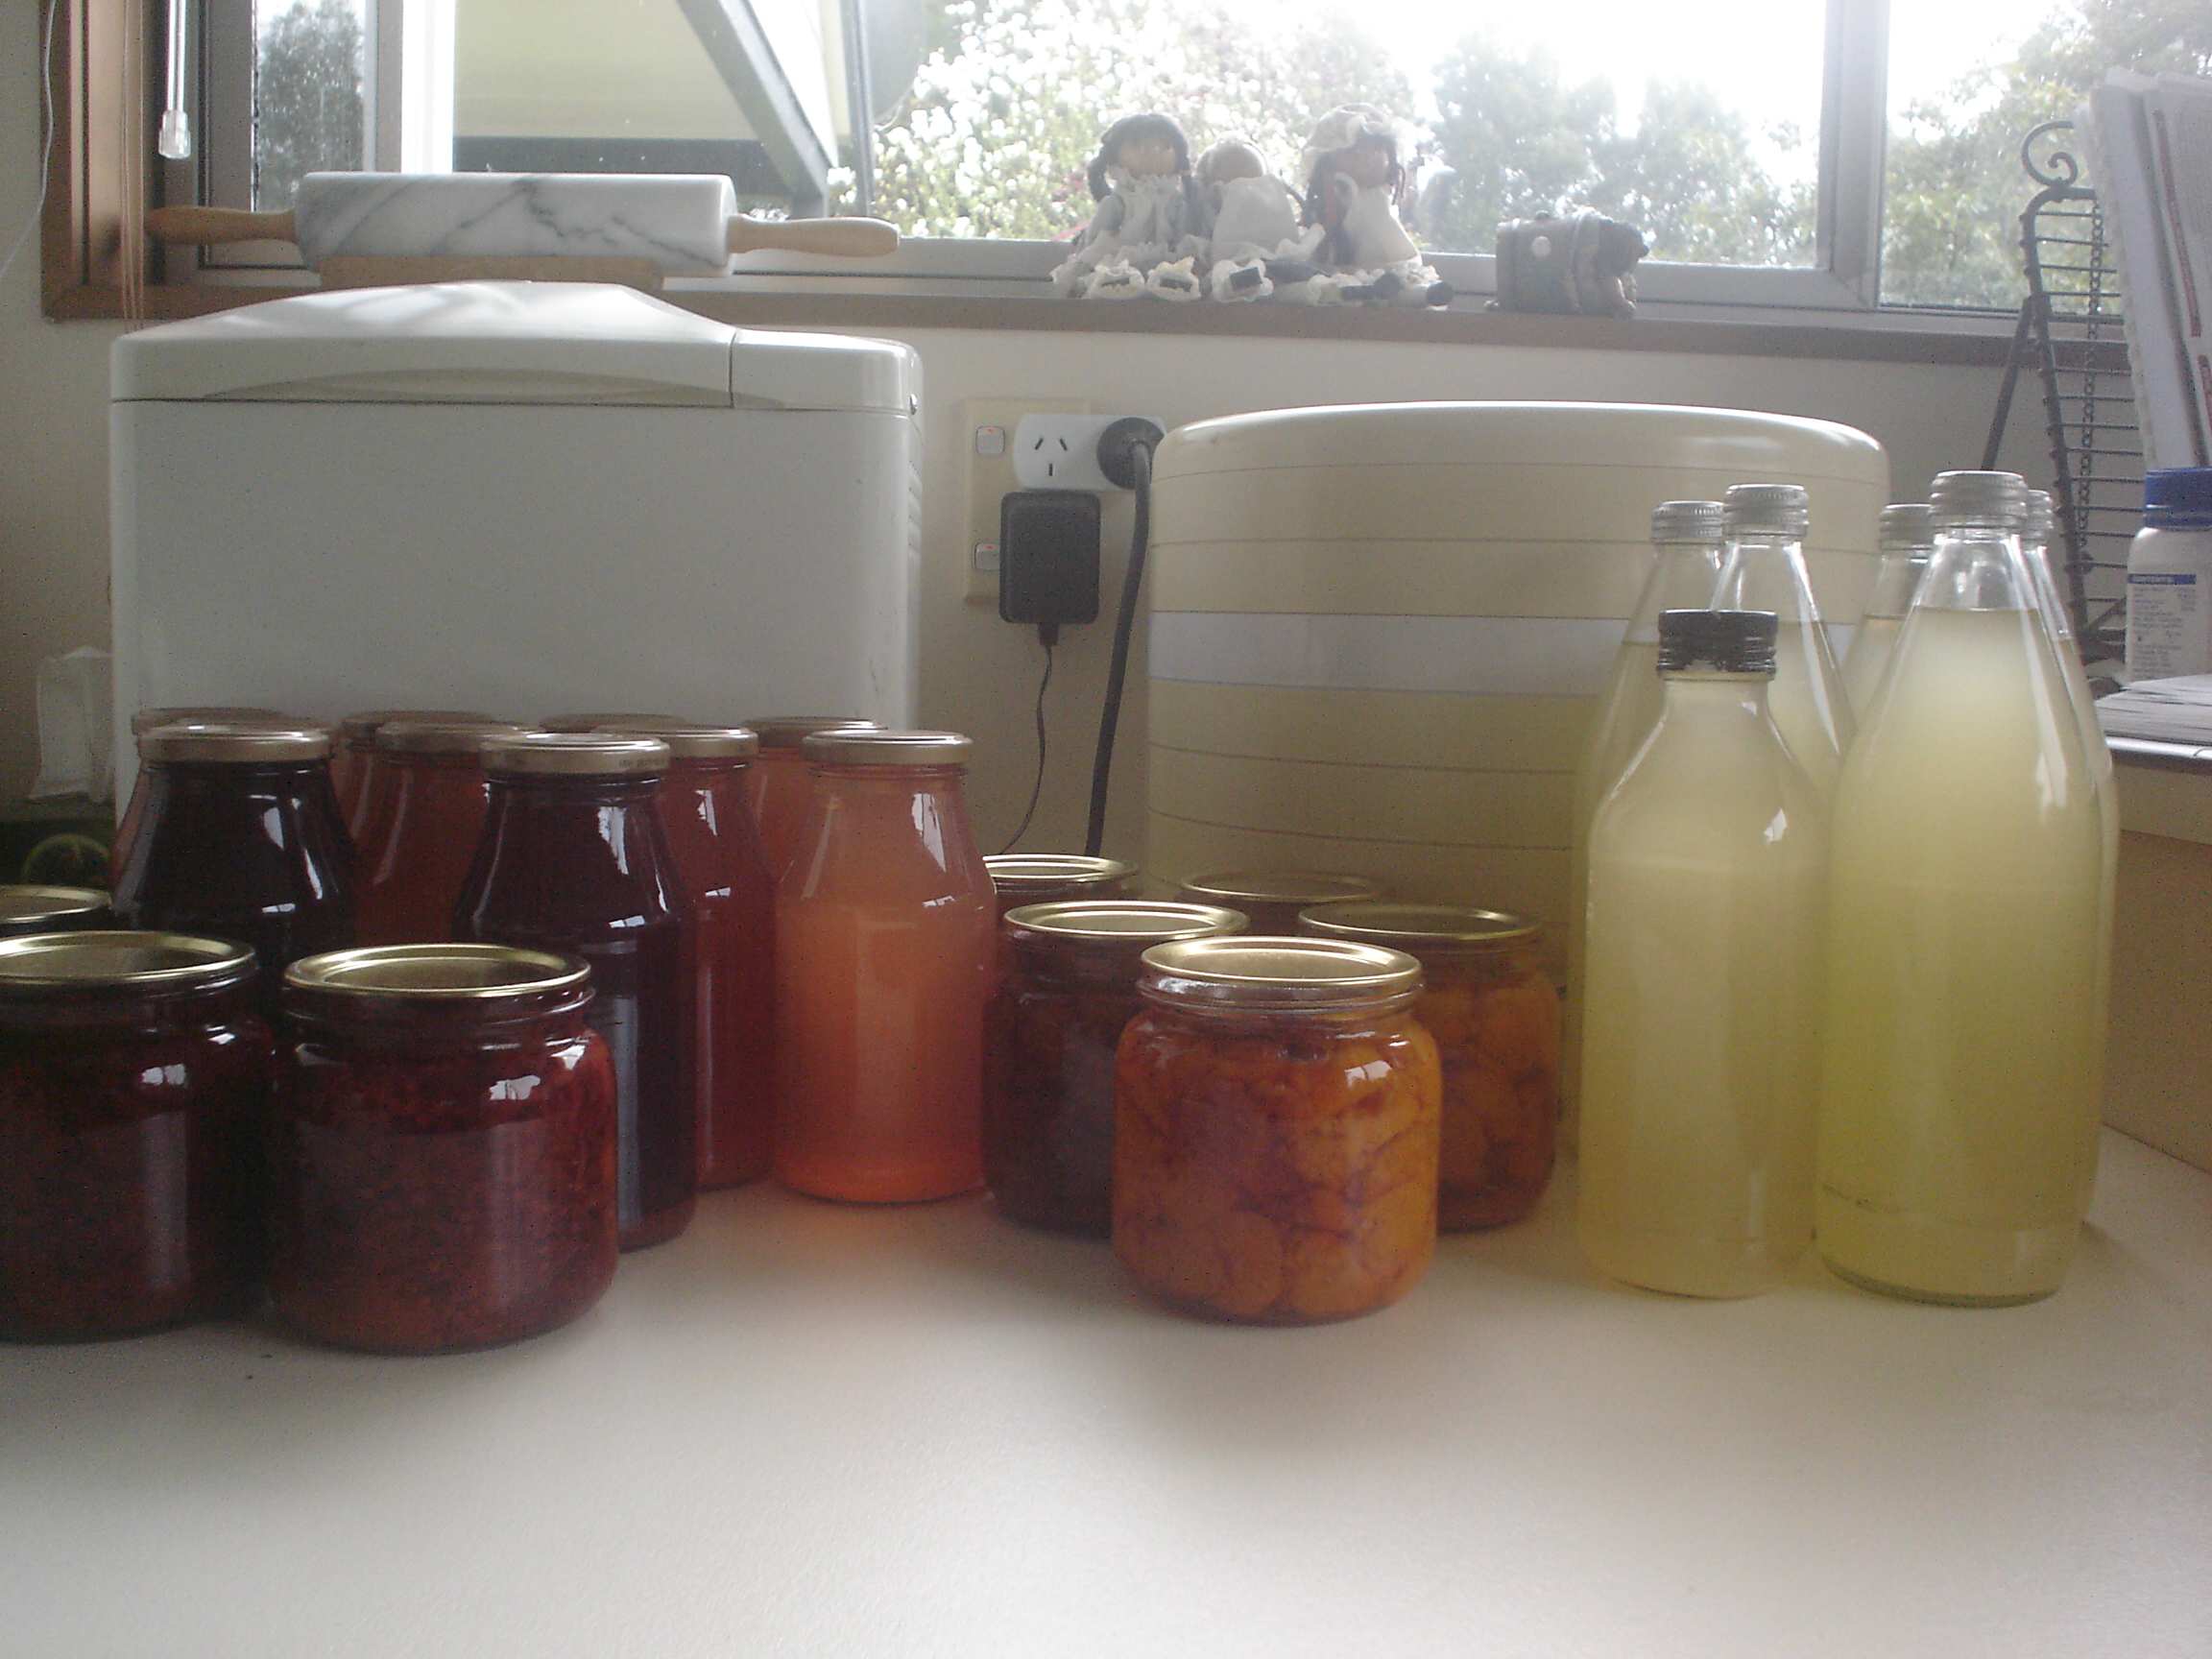
Today I bottled 11kg of tamarillos. We still have some fruit on the trees. There is a mixture of 3 varieties that have self-seeded in our avocado orchard and grown up tall to reach the light. I just go and give the trunks a good shake and they fall down if they are ripe.
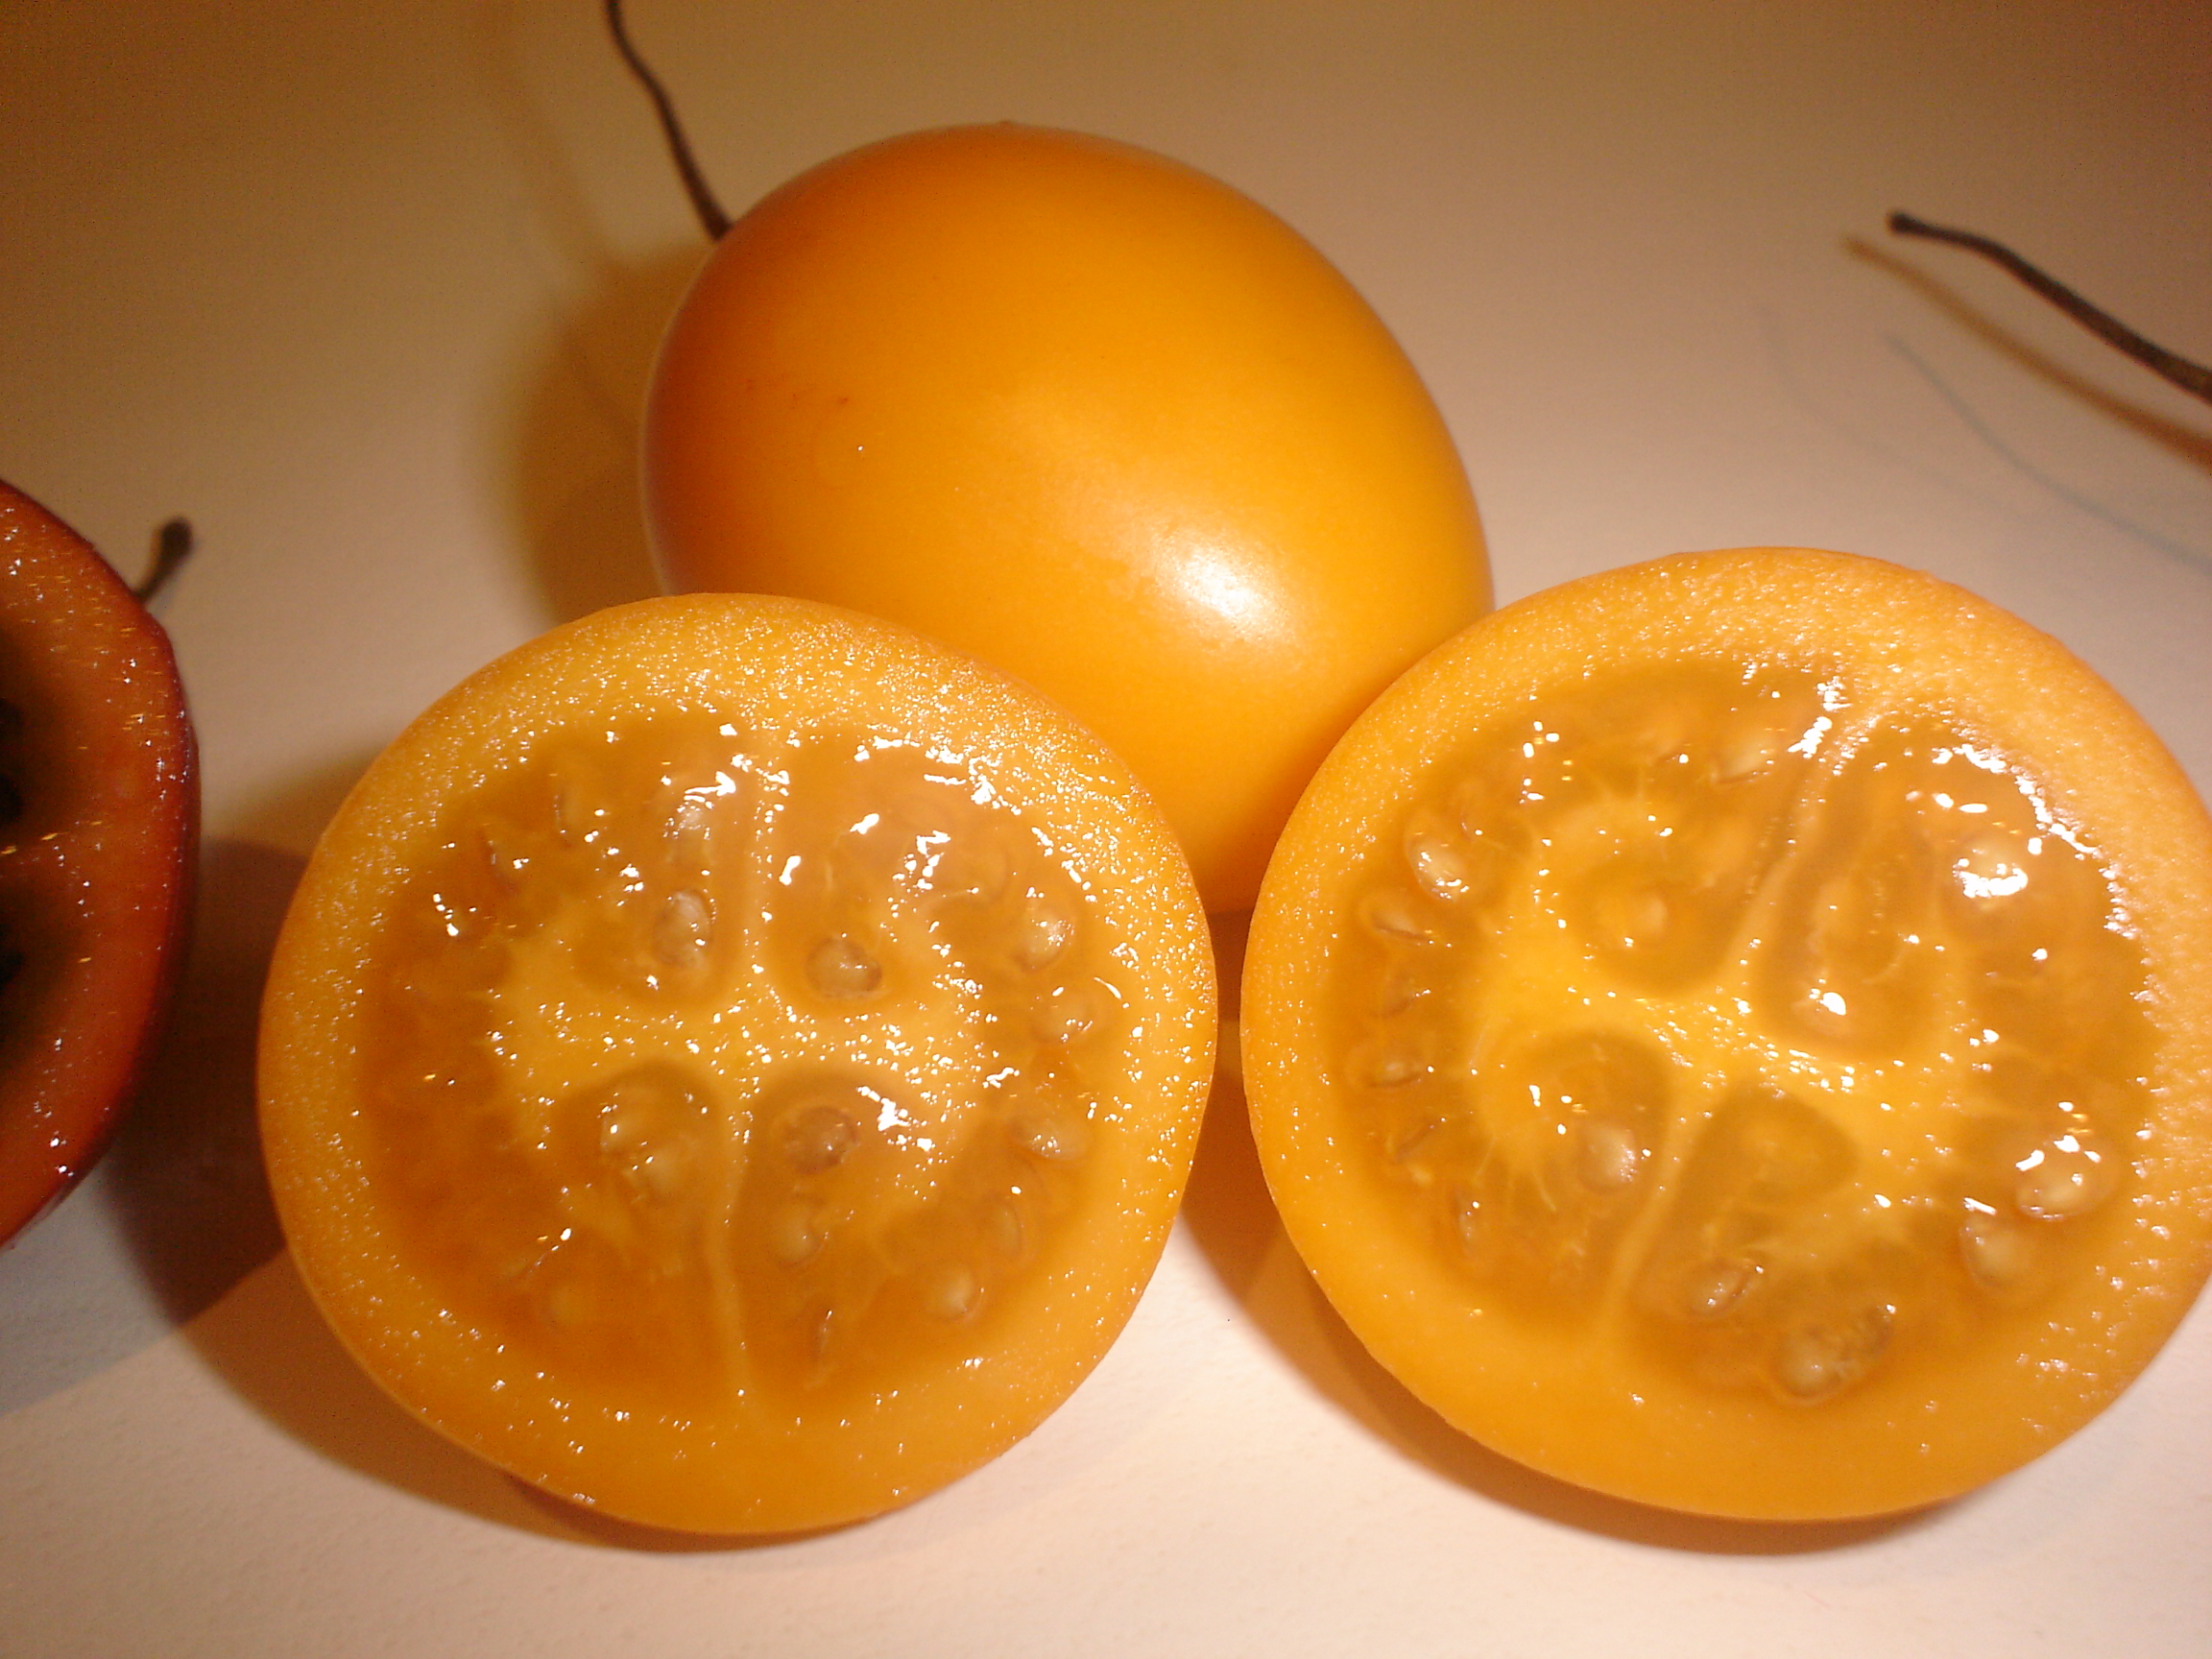
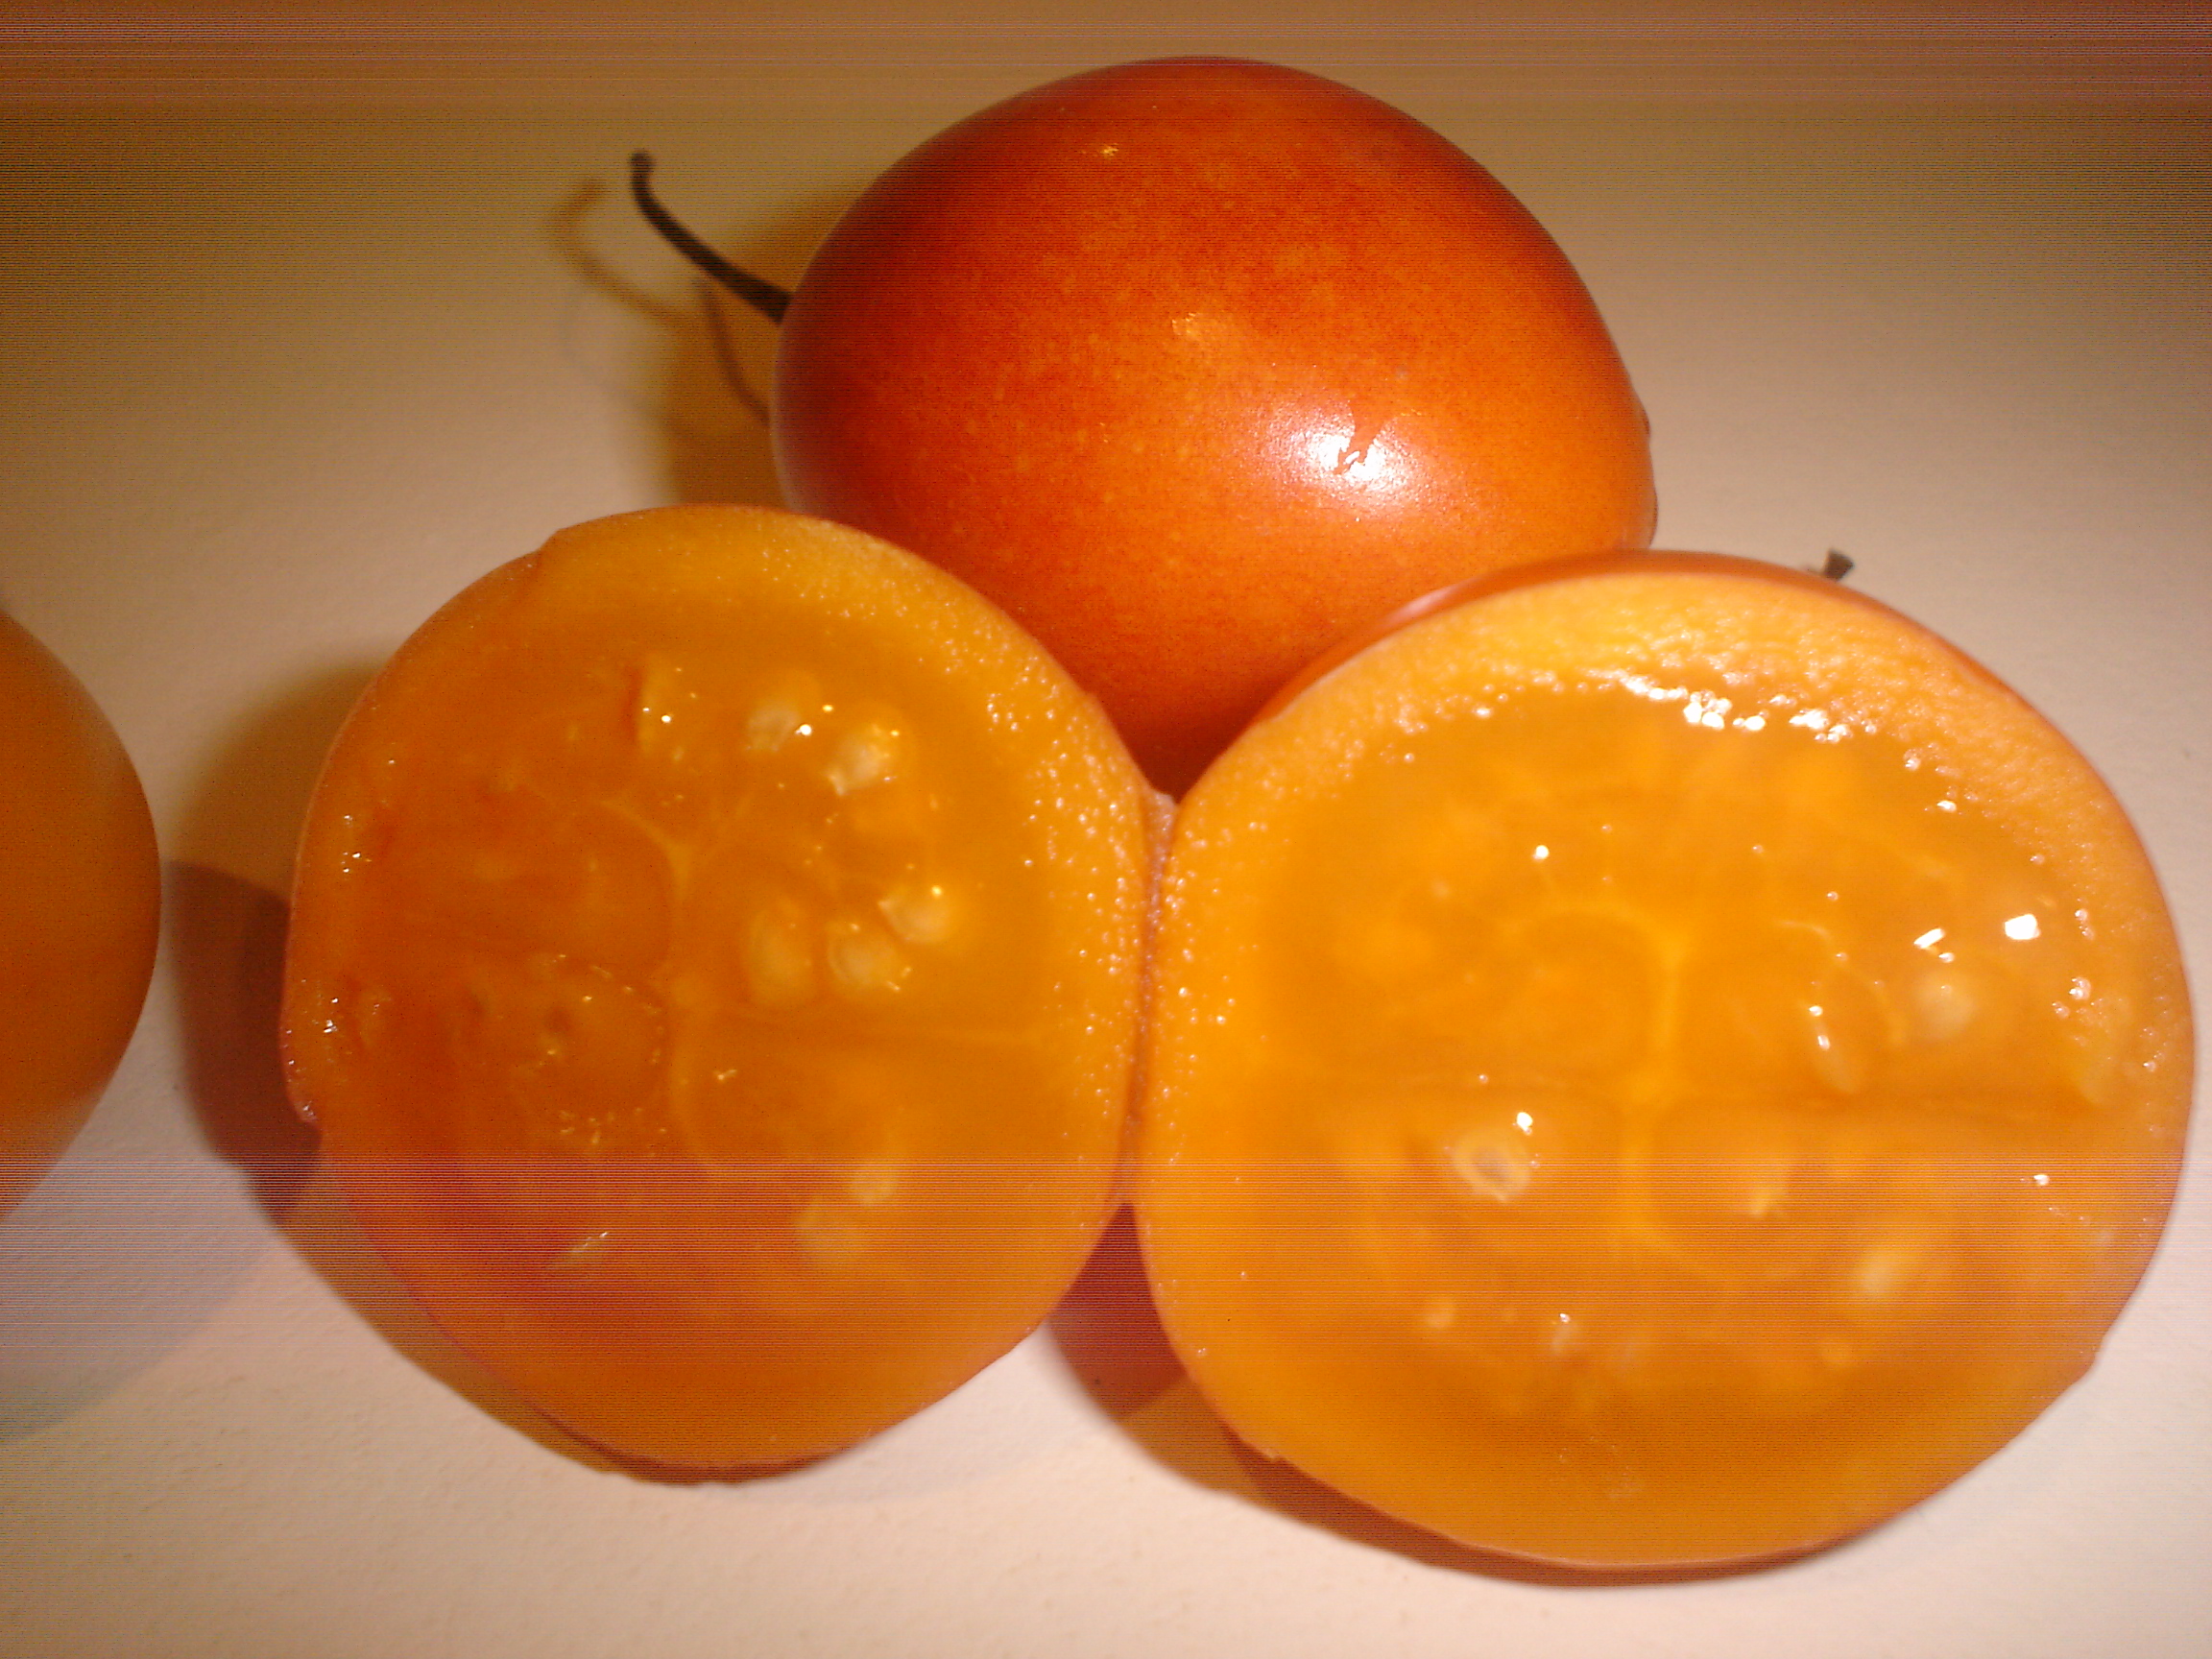
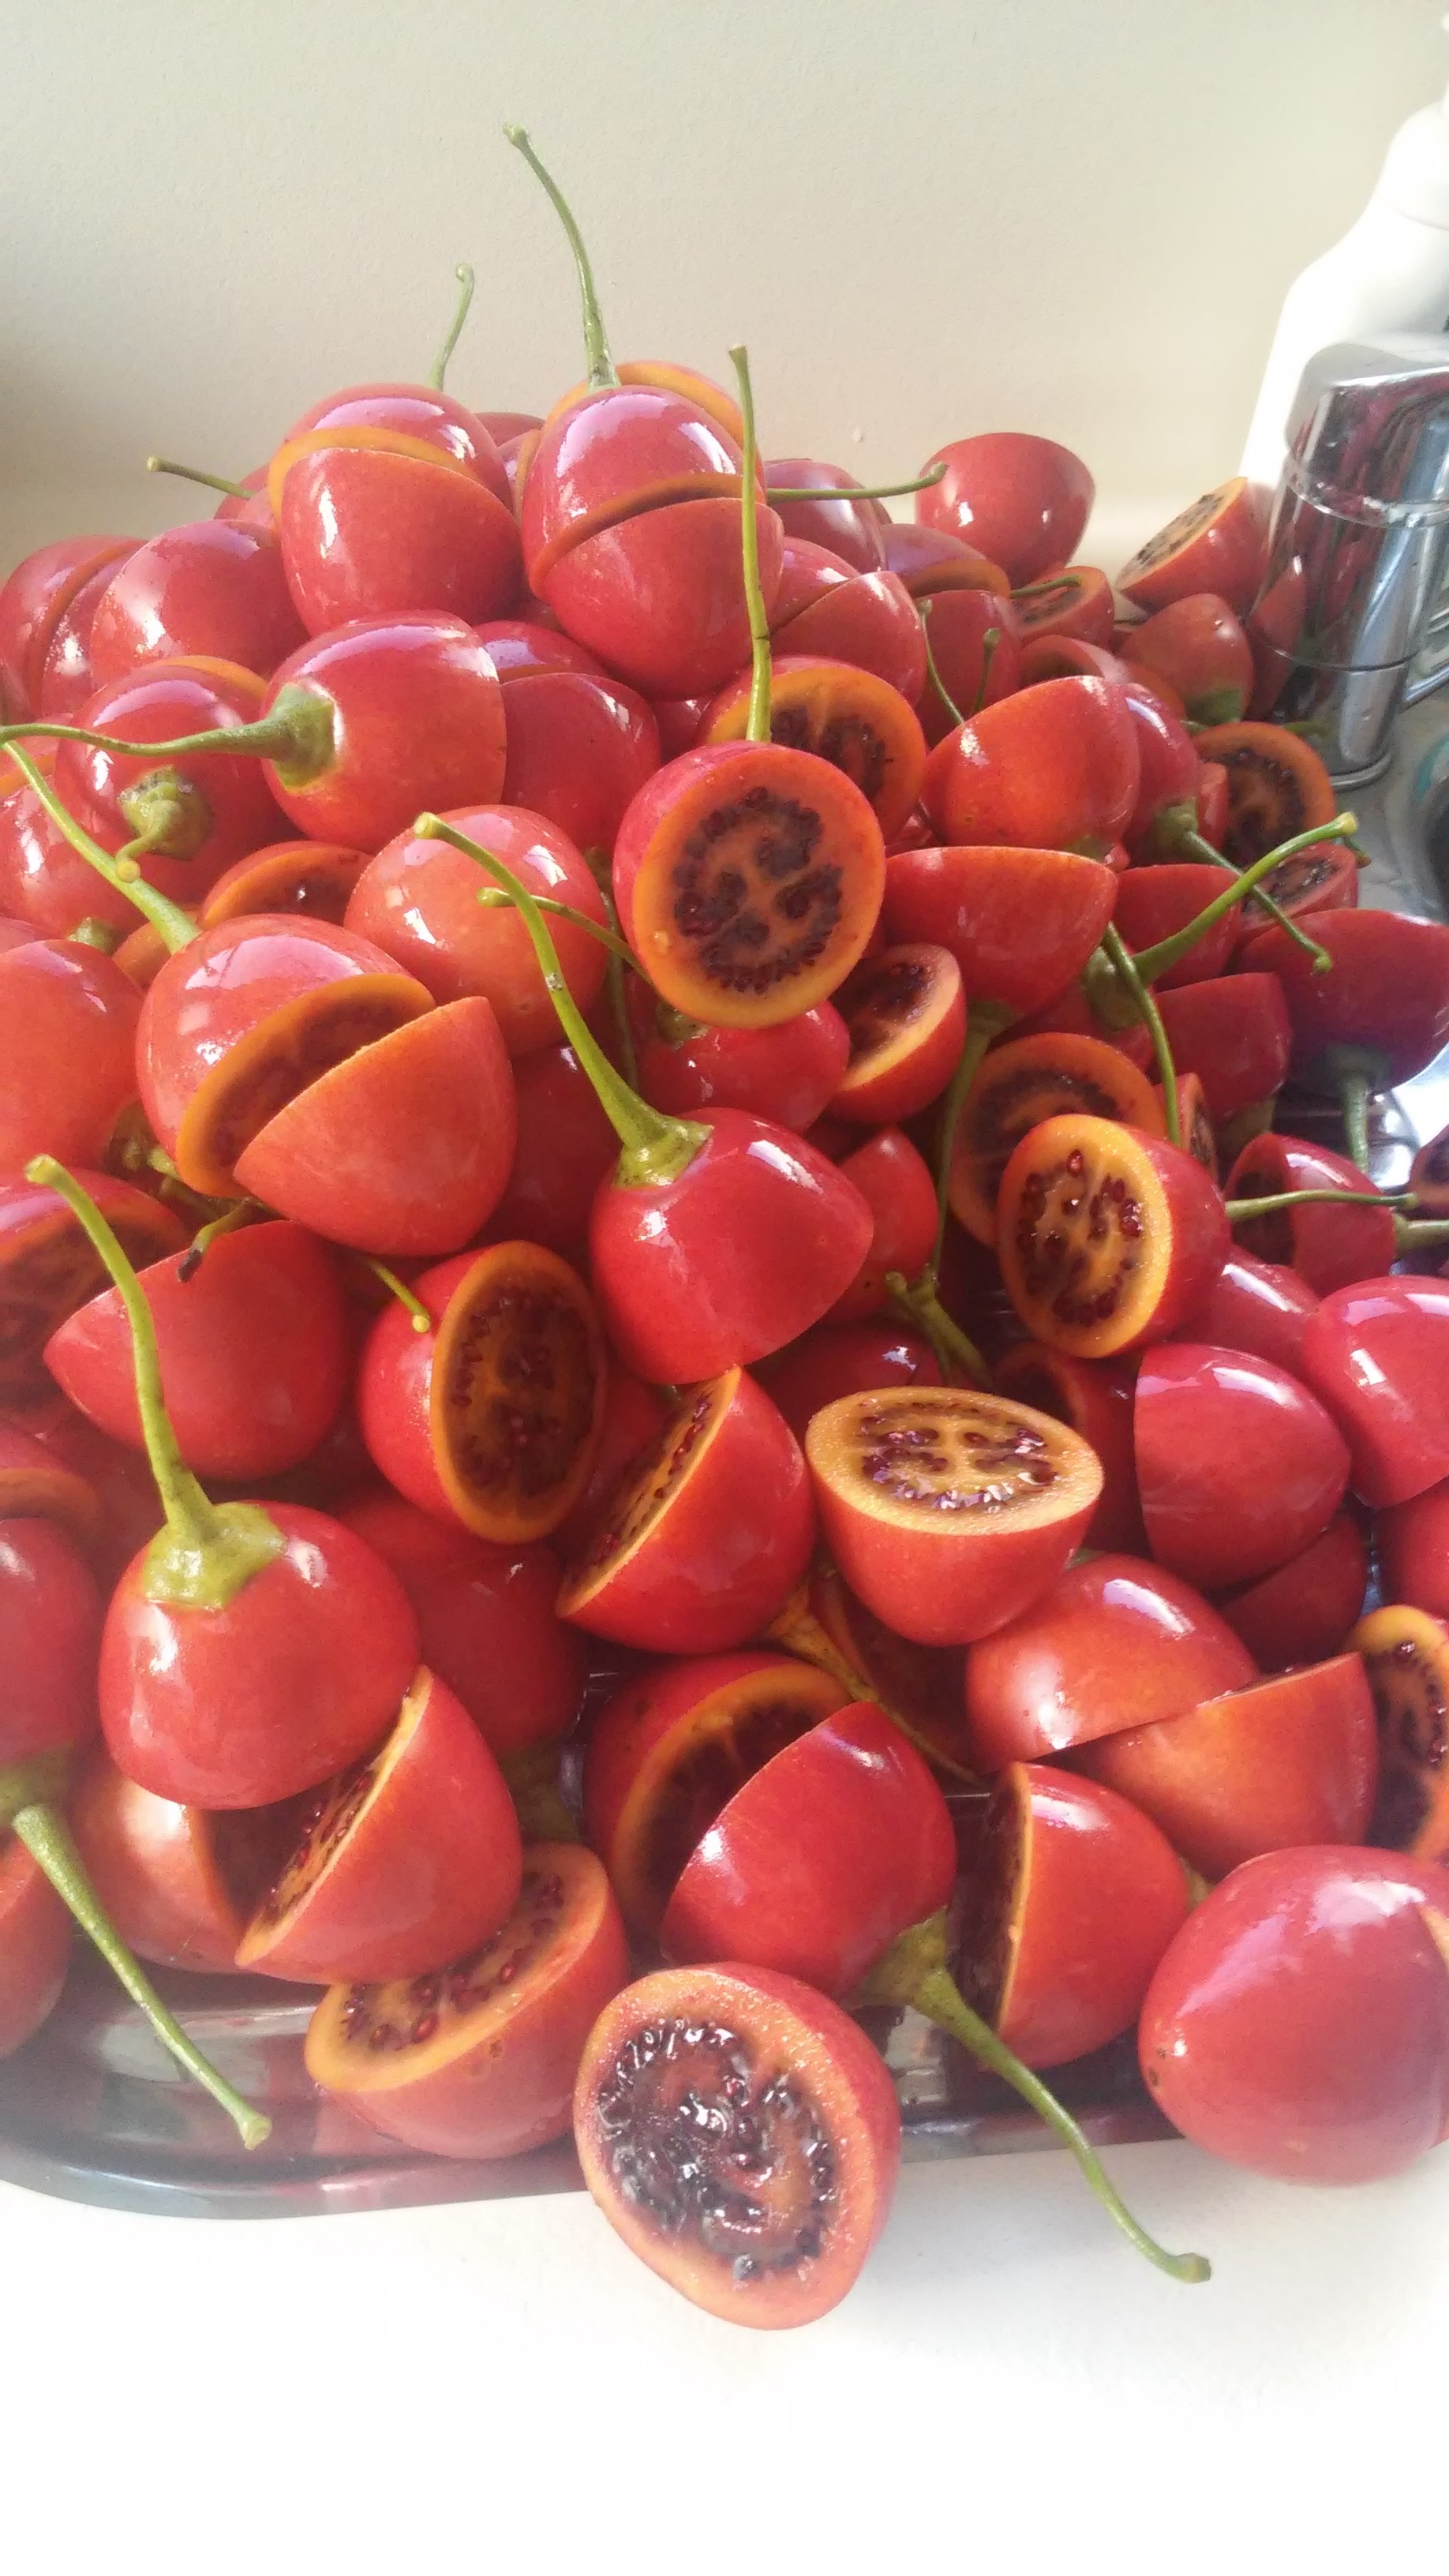
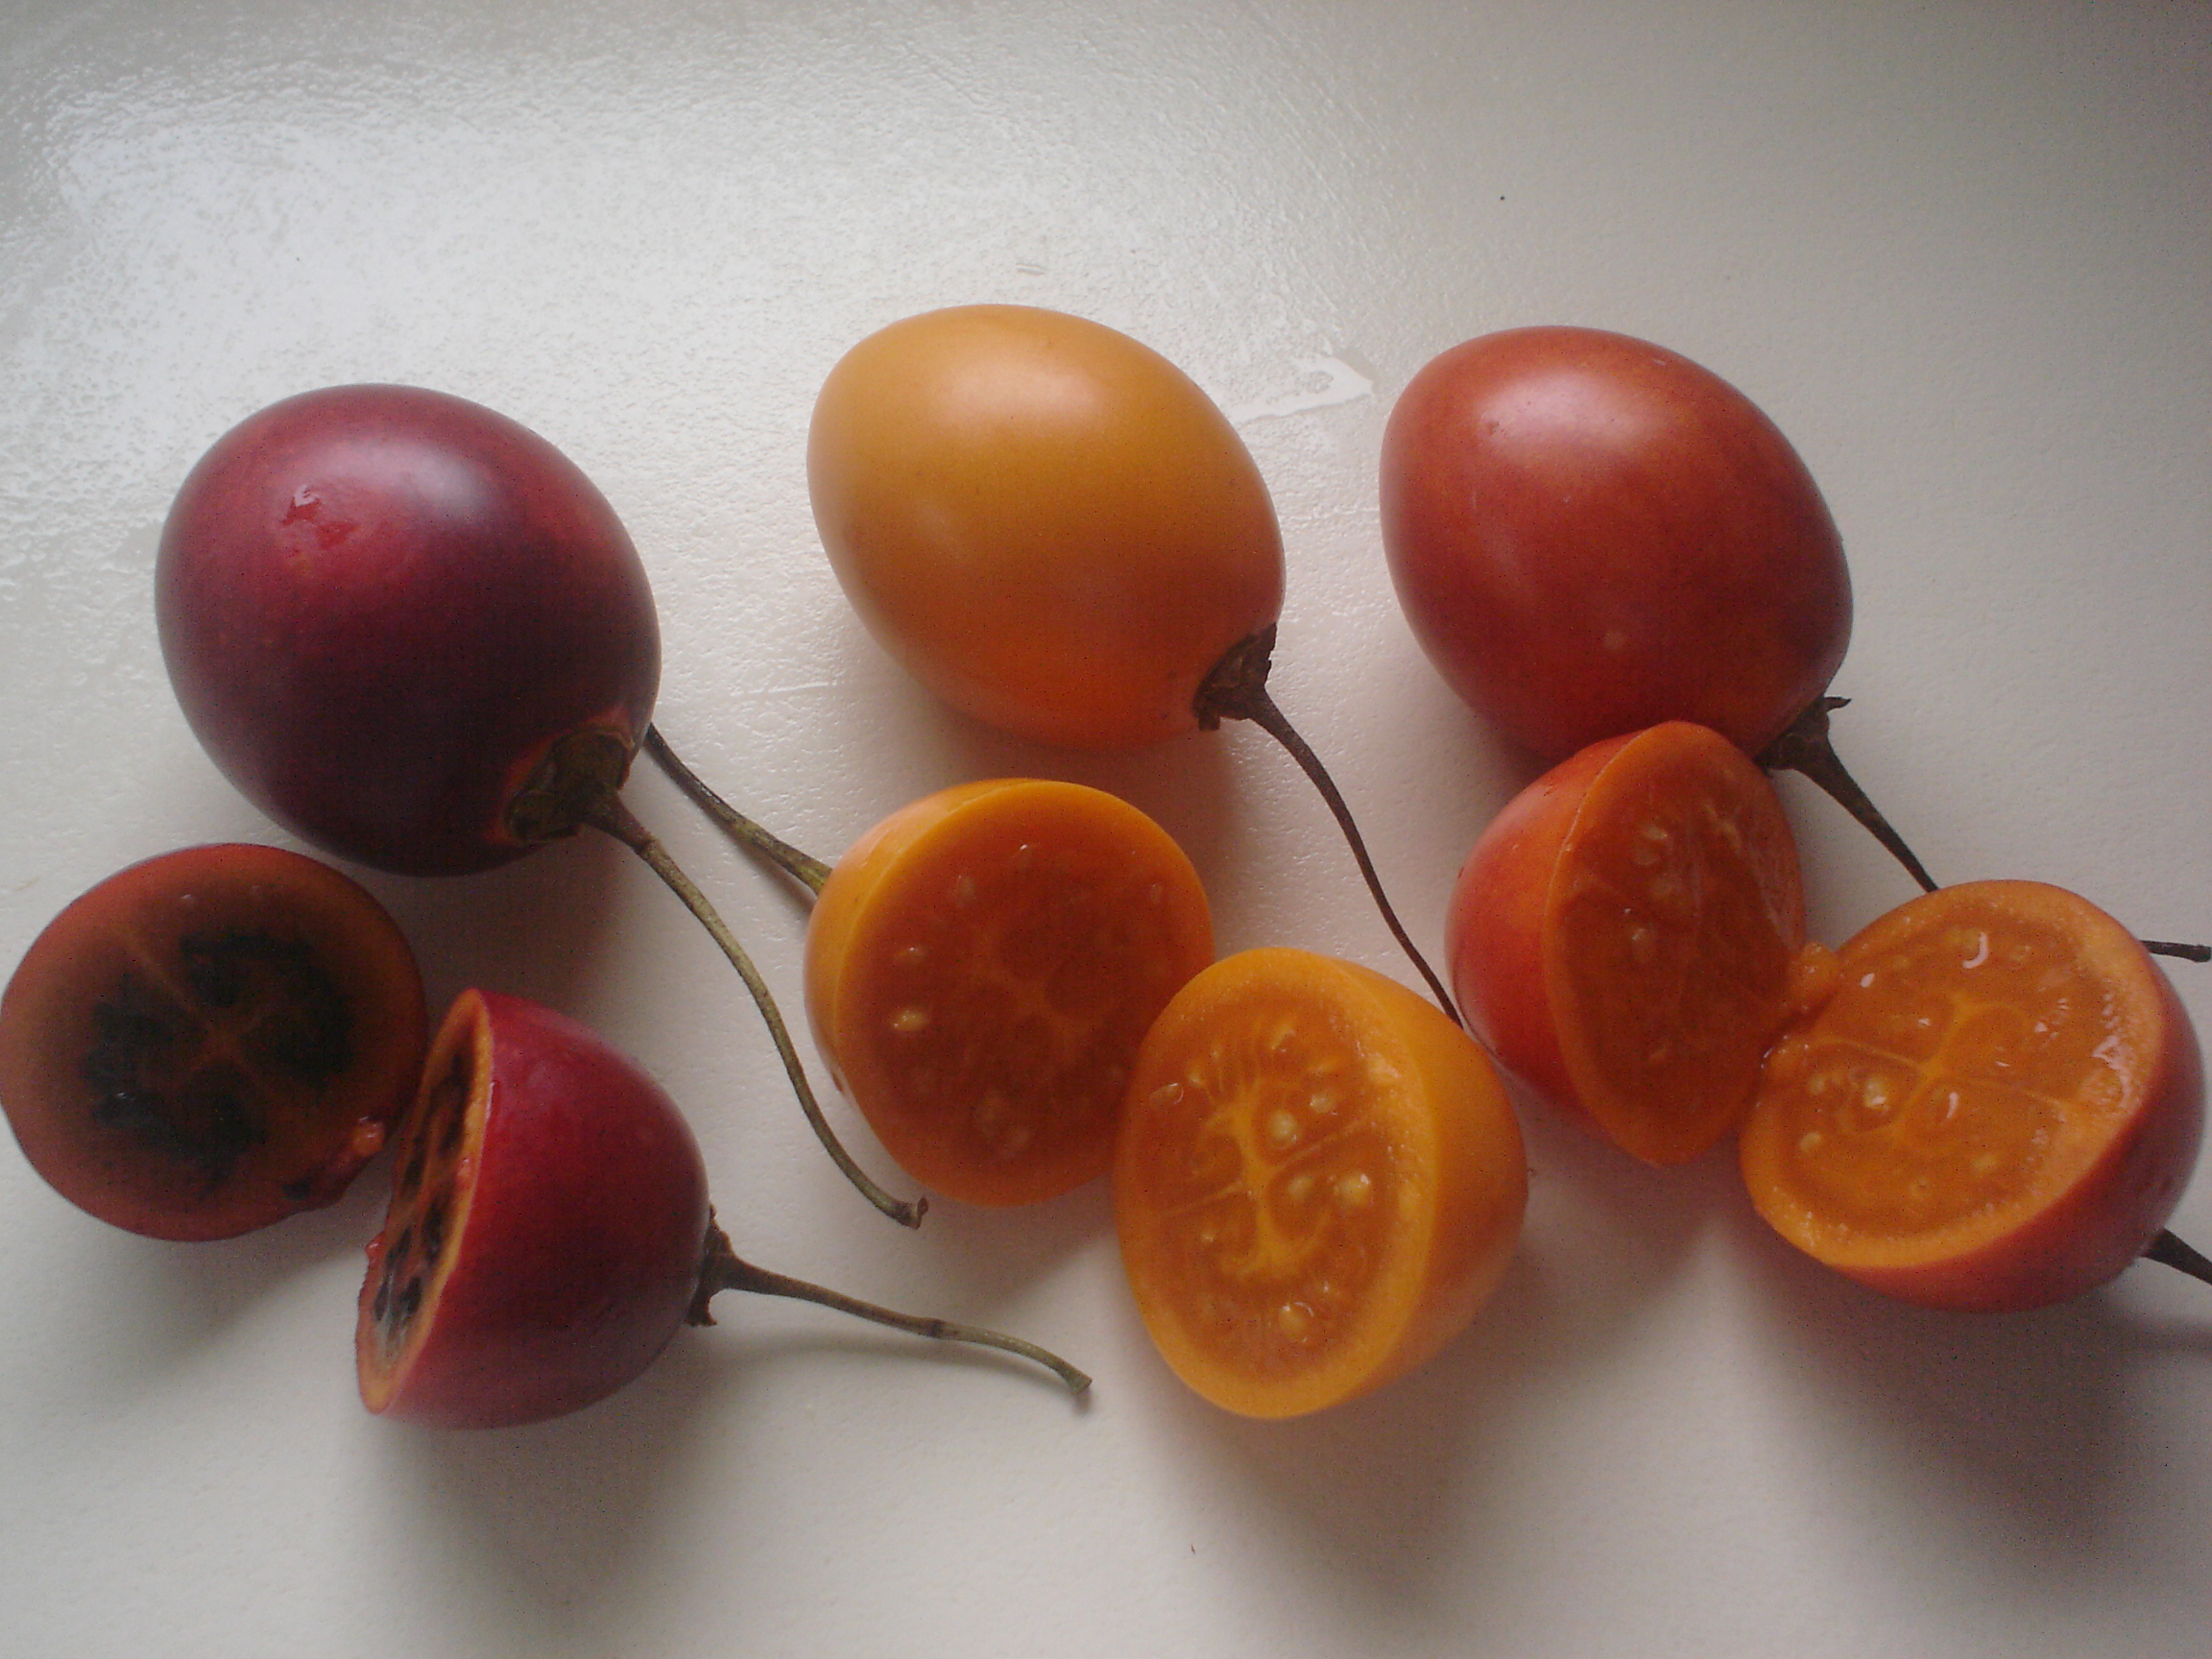
Red TamarilloGold TamarilloAmber Tamarillo
The three varieties are red, gold and amber. The red ones are more tart than the other two, so I tend to process the red ones in some way with sugar, and the gold and amber ones are good to eat fresh or to process, needing a lot less sugar.
I used the recipe ‘Bottled Tamarillo’s’ from my cookbook ‘Tamarillo Cookbook’ by Jan Bilton, and this time I decided to use wine instead of water. I have changed it slightly because I found it to be too sweet going exactly by the recipe. Naughty eh 🙂
Once I had bottled the tam’s, I had a whole lot of juice left over, so I bottled that too. It will be lovely diluted with lemonade or soda water, or just water.
One 10 litre bucket yields aprox 3 kg of scooped fruit, but for the recipe you weigh them before you scoop them out.
Ingredients:
2 cups water or red or white wine
3/4 cup sugar
1 kg tamarillos, halved and scooped.
Bring the liquid to the boil, add the sugar and stir to dissolve. Poach the tamarillos until just cooked. Spoon into clean preserving jars and fill to overflowing with the boiling liquid. Seal with vacuum seals.
With the excess juice left after bottling, strain, bottle and seal.
I’m sitting here with a small but well-deserved (half) glass of red wine. Its been a busy day on the farm and in the garden and that calls for the need for a wine don’t you think? It usually happens to me at least once every year. Who knows why? I don’t. But it happens, and you need to be prepared. You go out to do the ‘lambing beat’ on a cold wintry morning and there she is. A newly birthed ewe hanging around a limp yellowy-white ‘flat’ lamb. For reasons only known to nature herself, the lamb is flat out on the ground on the brink of death. Despite having been lovingly cleaned and stimulated by the mother, the lips are cold and blue, and the little body feels deathly cold to the touch.
So back to the house I go, with above mentioned floppy, ‘flat’ lamb in my arms, leaves, mucous and all. So if you read my previous post titled Emergency Lambs Milk Formula you will have a cupboard full of old towels, blankets, and ingredients for the formula. But the most immediate task to hand is to get the poor little blighter warmed up. And the trick is to do it not too quickly.
I filled the laundry tub with luke warm water. Only luke warm, as she was very cold and I didn’t want to add any more stress to her already compromised little body. I lay her in the tub with her head in one hand, and gently stimulated her body by quietly taking the remaining bits of afterbirth off. Then I lay her on a pile of towels and covered her while I ran a slightly warmer tub of water. She lay in this for a few minutes until I could feel that her legs were warming up. I took her out, quickly towel dried her, wrapped her up in a woollen blanket, and sat and cuddled her.
Sibling rivalry between Oscar and the ‘flat’ lamb.
Oscar was most indignant that I should be cuddling something else other than him, so he was on my lap too, trying to get closer to me than the lamb was. Talk about ‘sibling rivalry’!!
Anyway, after a while she started shivering, a good sign, and trying to move about a little. So I set about making up some lambs milk formula and warming it to blood temperature. Now, often times they are initially too weak to suck, so you just have to hold their mouth open with their head raised and neck stretched (as if they are feeding off their mother), and give a wee squeeze to just get a couple of drops in. Don’t squeeze any more in until you have seen the lamb swallow the first lot. If you put too much in it could go down into their lungs and after a couple of days they will get pneumonia and die. You may have to use a dropper for a couple of times instead of a teat if they are too weak to suck. Don’t give more than 50mls at this early stage, and before long you will notice that she is perkier and stronger, and able to suck off a teat and take 100mls. If you have cows colostrum, prepare this as I wrote about in Emergency Lambs Milk Formula. And make sure you spray her umbilical cord with iodine to prevent any infection from getting in through there.
You will know that she is getting the milk through her system when she starts pee-ing, and her black poo becomes that lovely karitane yellow.
If your lamb gets the scours, this can be life-threatening and is usually caused by overfeeding, or too rich milk/undiluted colostrum. Reduce the amount of milk each feed, and make sure its diluted at the right rate if it is milk powder formula. A little bit of egg yolk and/or Homemade Pectin in the milk will help bind them up. Always have fresh water available though, as they can dehydrate very quickly.
When you decide that she is going to survive and have purchased a bag of lambs milk powder, make sure that you dilute the mixture more than the recommended rate initially and slowly build up to the proper amount. This gives the little lambs delicate system a chance to get used to the new formula without getting scours.
If the lamb just doesn’t do well, then starts walking as though she has sore legs, her joints appear swollen, and there is a hard lump where the umbilical cord attaches to the body, this usually means ‘navel ill’ which is from infection coming in through the umbilical cord. This requires antibiotics from the vet.
If the breathing starts to sound rattley and laboured, that is usually pneumonia and also requires antibiotics from the vets. They often won’t survive this.
So I hope all of this was helpful. I will write more about the joys of farming sheep soon :))
I use pectin quite a bit. Its great for helping jams to set, coconut yoghurt to thicken, and also for lambs with the scours. Actually, it works for humans with the ‘scours’ too. Remember grandma’s remedy for diarrhoea? Stewed apples!!
All you need is about 7 large tart apples (aprox 1 1/2 kg). I use ‘Granny Smith’ variety.
Wash but don’t peel. Cut into small pieces, put into a pot, cores and all.
Add 4 cups water and 2 tbsp lemon juice. Boil for about 40 mins. Strain through a cheesecloth or jelly bag. Boil the liquid another 20 mins. Pour into sterilised jars and seal.
I will put a photo up when I have made my next lot. I just used the last of mine on a lamb with scours 🙂
See, I told you it was easy. Or did I? Anyway, it’s easy 🙂
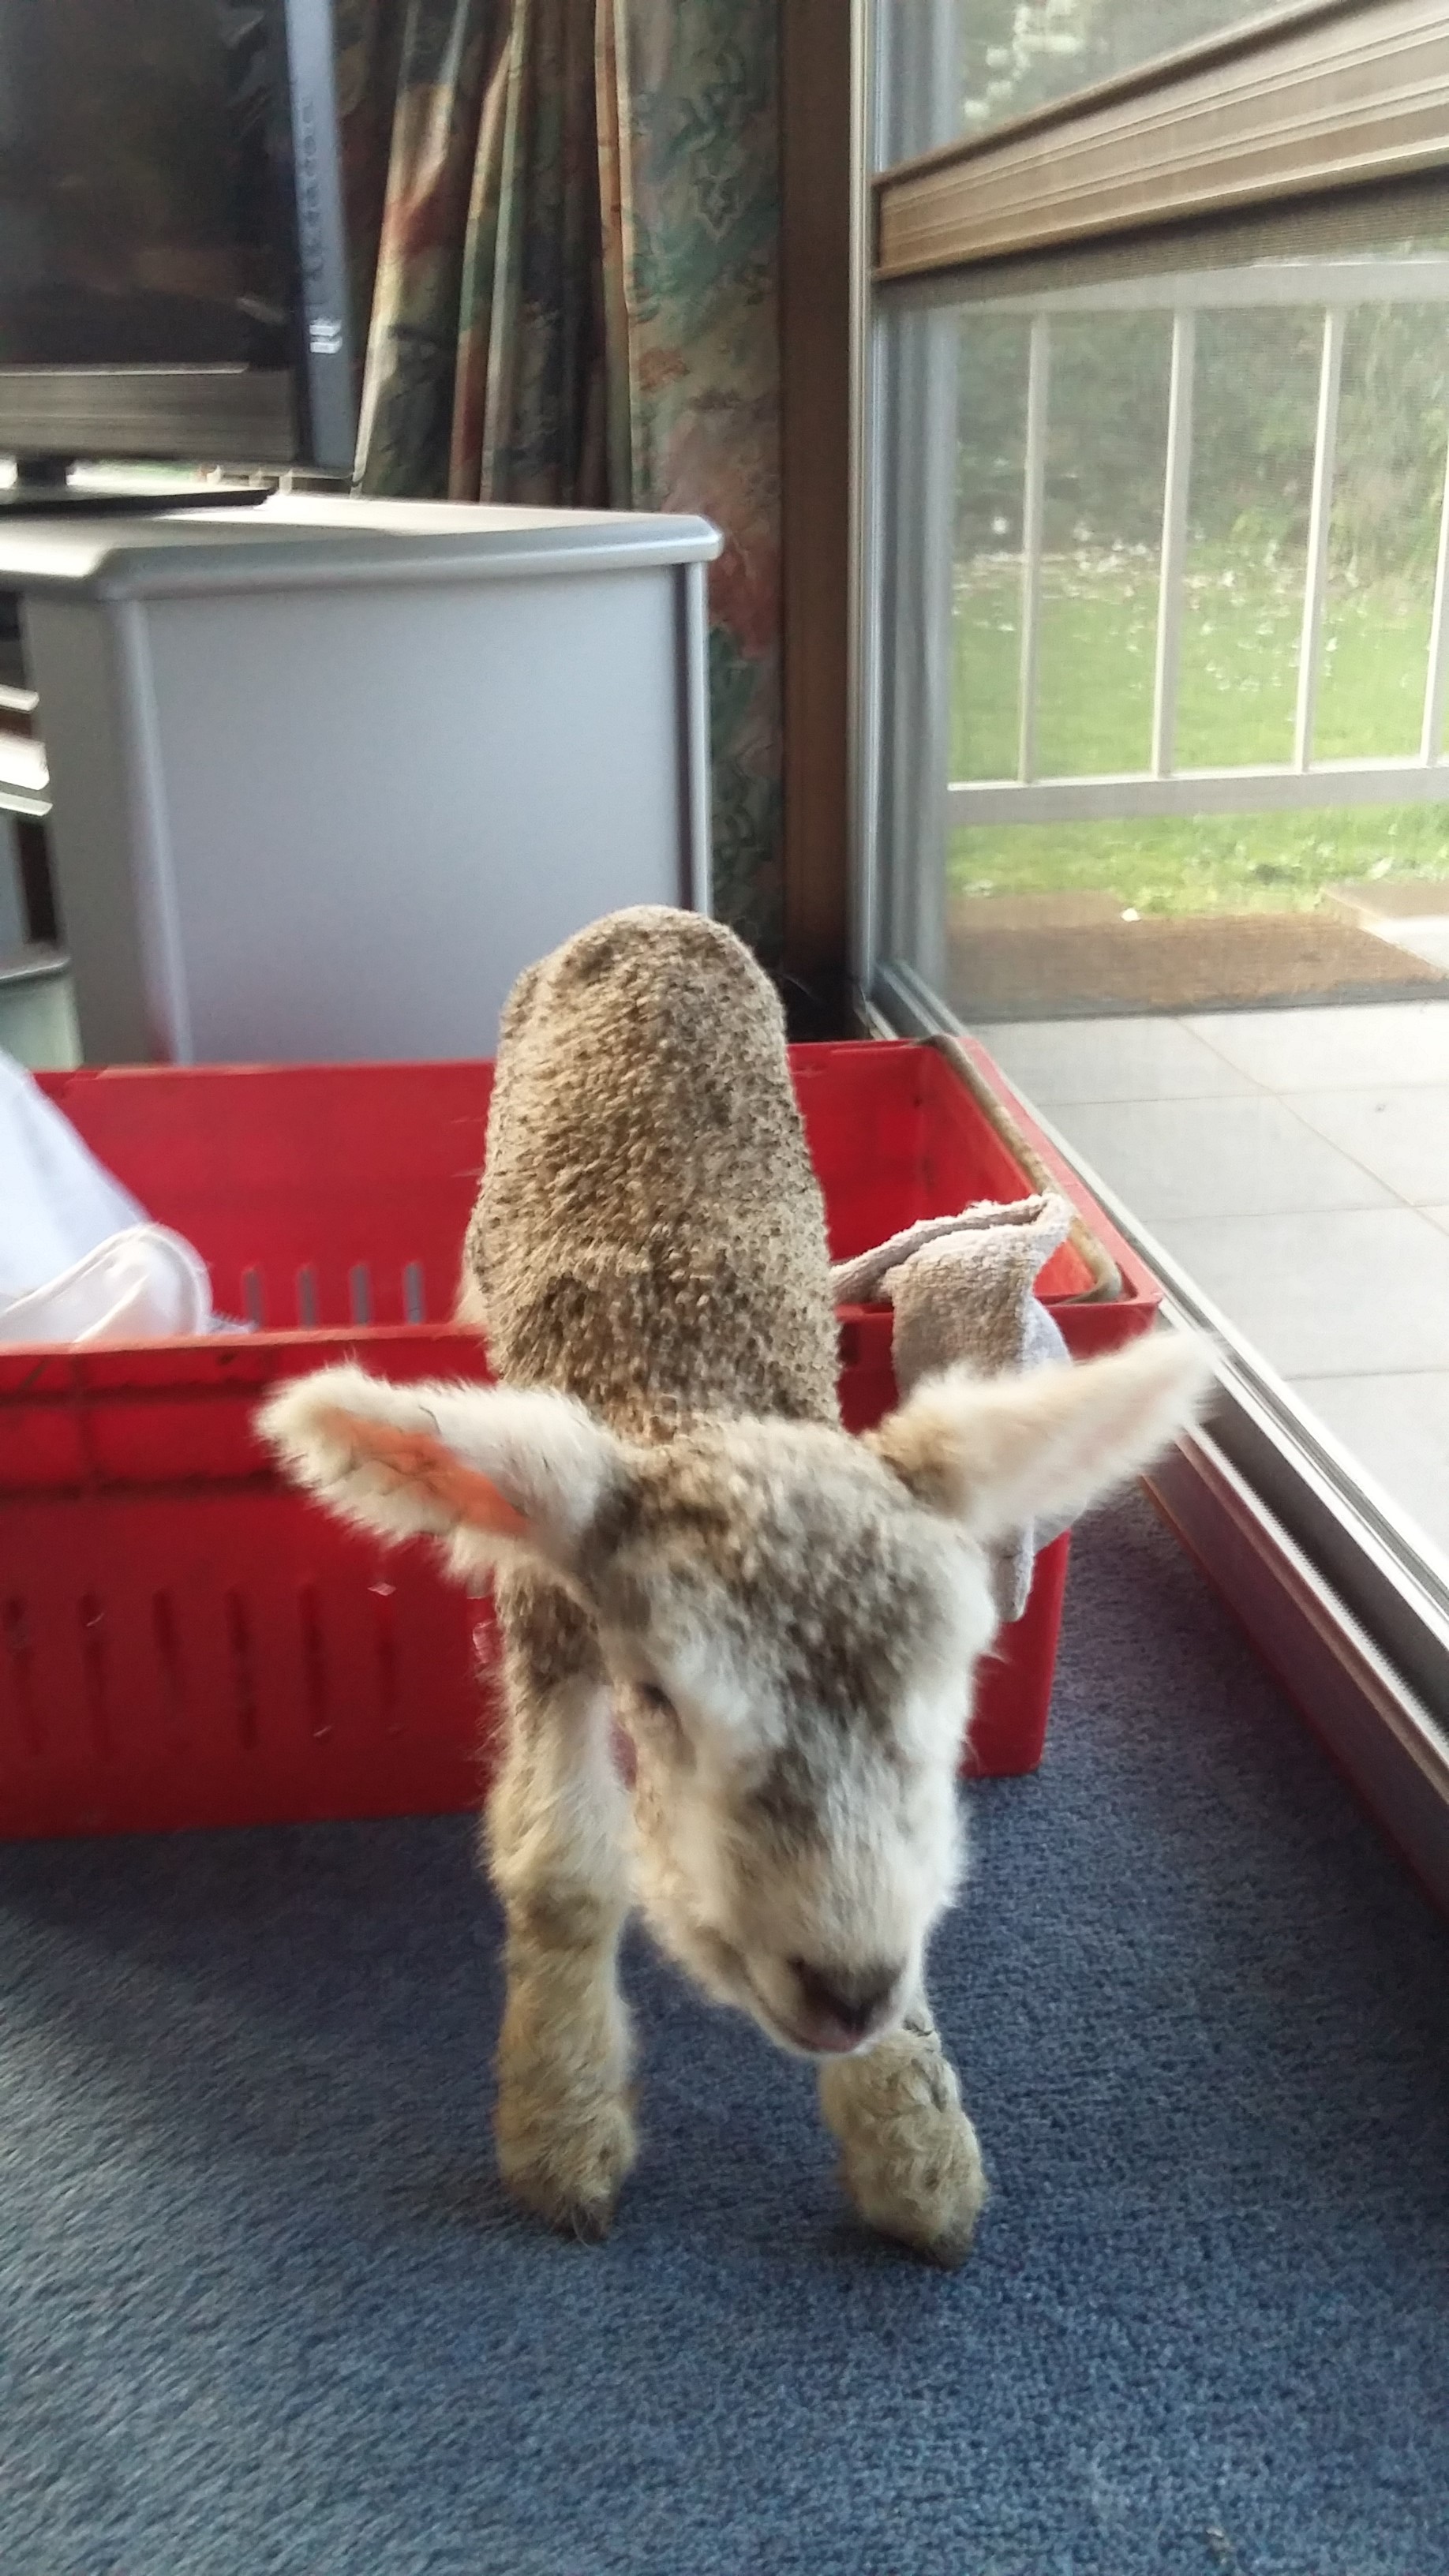
Its a boy. Its a girl. Its another boy. IT’S TRIPLETS!!! But ewes are just not designed to feed three lambs, what with only having 2 teats in all. So invariably there’s the weakest one that either dies or has to be taken in and hand reared. I usually leave them on the mum for 12 to 24 hours to try and get some colostrum, but you always know which one isn’t getting a good feed because they are the one either frantically baa-ing and running around after mum, or they are nearly dead on the ground, as this little boy was. And I just can’t make myself leave them there to let nature take its course 😦
Happier now that I have a soft warm bed.
“But what do I feed him?” I hear you ask. Well there are three options.
Ask a friendly dairy farmer for some cow colostrum, dilute it 50/50 with water and feed him that for a couple of days.
Invest $70-80 in a bag of lamb milk powder. But only do that when you are sure that he is going to survive.
Make this emergency milk formula to feed him while you see over a couple of days whether he’s going to make it or not.
I did both 1 and 3. My son had some colostrum frozen into ice cube trays in his freezer, so I pinched that off him, and then put him on my formula until I can find a home for him, or decide whether to rear him myself.
So the cow colostrum is thick and gluggy, especially after it has been frozen. But all is not lost. Thaw it, warm it a little, then force it through a fine-ish sieve with the back of a spoon. This breaks it all up so that it doesn’t clog up the teat. About 4 ice cubes of colostrum melts down to aprox 50mls I find, so diluted 50/50 with water it makes 100 mls which is plenty for each feed on the first day.
Before lambing season I always have a bit of a emergency kit ready. Heaps of old towels and a crate big enough that they can’t climb out. At least not initially. Some warm old blankets – I go to the second hand shop and look in the ‘pet bedding’ section. A dropper bottle for those ‘flat’ lambs that can’t even suck. A couple of lambs teats, and a plastic vinegar bottle or ‘pump’ water bottle to screw the teat to. Oh, and some iodine spray for their umbilical cords if they were lying in mud. And some eye ointment because it often seems to happen that the weak ones end up with a gammy eye or two. And some cod liver oil to make the formula with.
Mum thought this crate would keep me in for a while, but I have other thoughts.
The formula is simple:
750mls blue top (homogenised) milk.
1 egg lightly beaten.
2 tsps sugar
2 tsps cod liver oil
Gently warm to dissolve the sugar and then make sure it is no warmer than blood temperature. (drop some on your wrist, if you don’t feel it, then it is blood temperature).
Easy as. Feed about 100mls 6 times a day for the first day. For the 2nd to 4th day feed 150mls 6 times a day. After that they should be on lamb milk powder so follow the instructions on the bag.
Make sure that the lamb pee’s within a couple of hours after its first feed from you, and then poo’s. the poo will be black at first, and then it will turn to karitane yellow as the milk starts to go through its system.
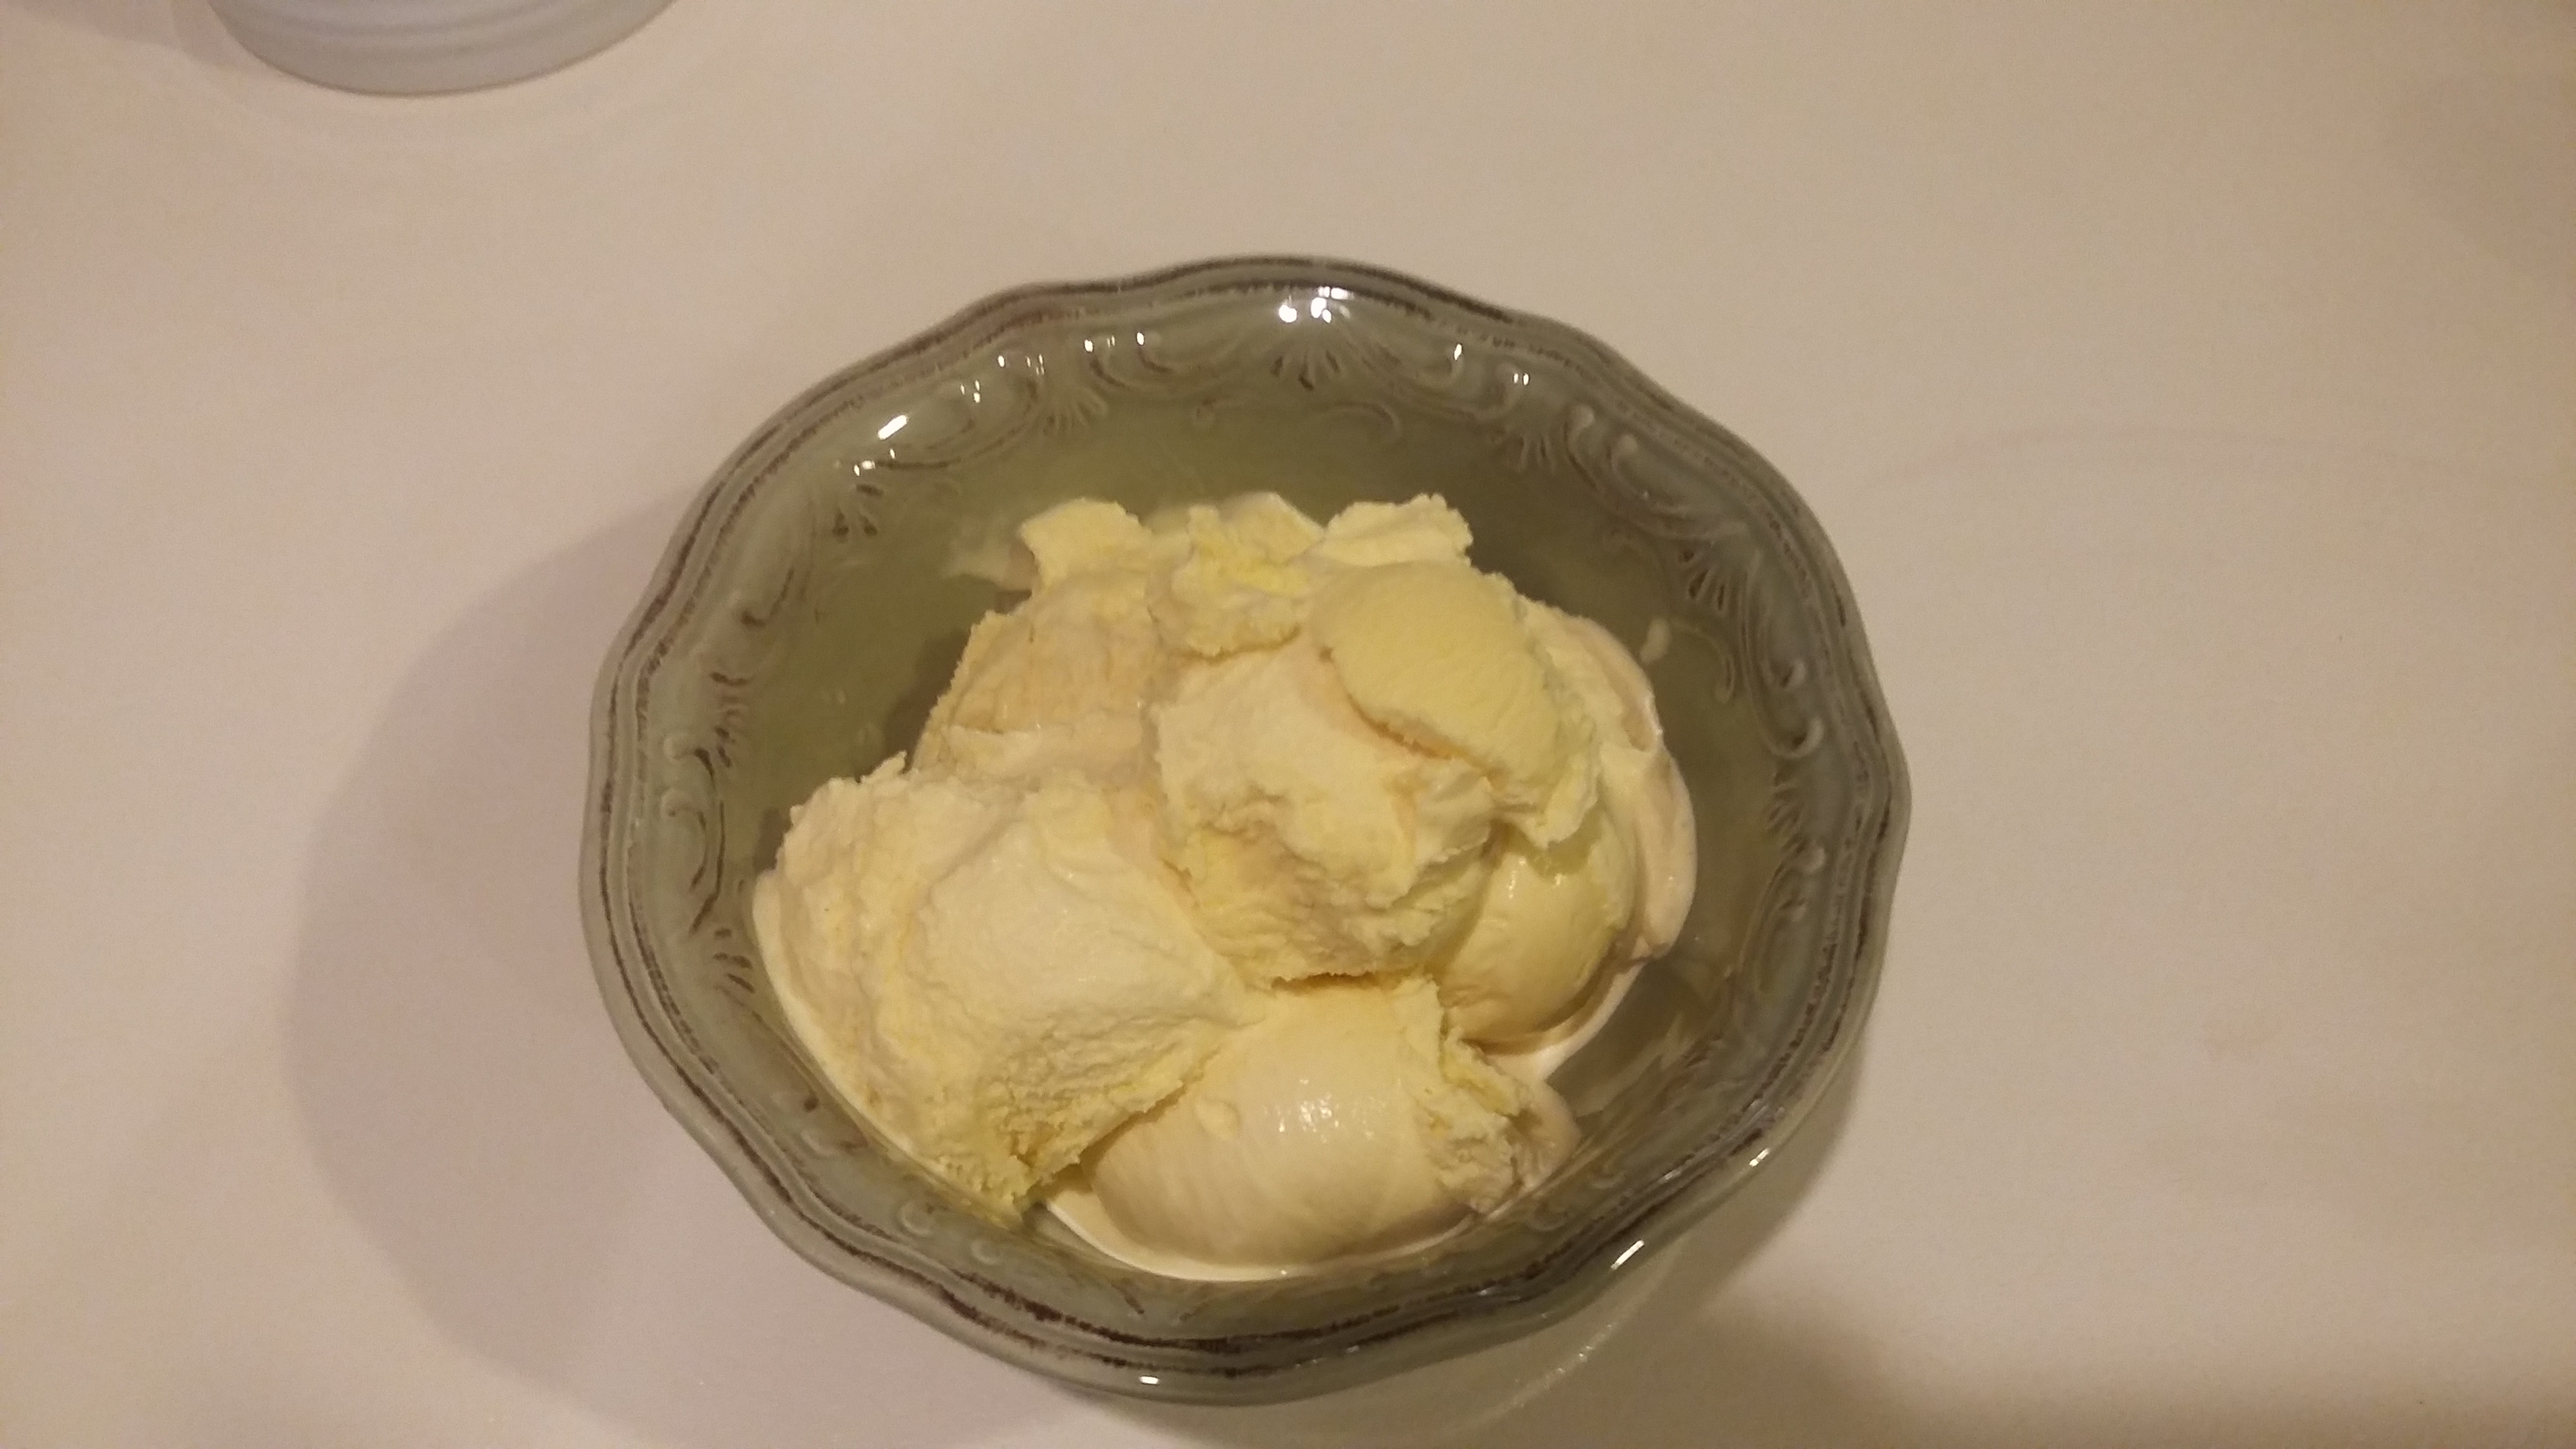
Another recipe for when your chooks are laying enthusiastically. This vanilla ice cream is very rich and creamy. I guess it’s the equivalent of a commercial french vanilla, but this one is way better. Serve with various crumbles and other hot desserts. Or, if you must, just eat it on it’s own. If you are by yourself and no-one sees you, then did it really happen?
Don’t worry if you haven’t got an ice cream maker although they are quite a cheap item to buy. Just freeze the mixture a little, beat, freeze a little more, beat, etc etc until it is of the right consistency. This recipe makes aprox 1 litre of ice cream.
This recipe comes from a Family Circle recipe book called ‘Ice-creams and Desserts’.
Ingredients:
3/4 cup caster sugar
2 vanilla beans, split lengthwise, or 1 tsp vanilla extract
1 cup milk – raw is preferable, but bought is fine if you don’t have access to raw.
6 egg yolks, lightly beaten.
2 cups cream – raw is really yummy, but bought is fine if you don’t have access to raw.
Method:
Place sugar and vanilla beans (or extract) in a double boiler or a heat-proof bowl over a saucepan of simmering water. Pour milk over and stir until sugar is dissolved and milk is quite hot.
Remove milk from heat. Place beaten yolks in a heatproof bowl or jug. Slowly pour milk over egg yolks, whisking as you do so.
Return mixture to double boiler. Stir constantly over low heat until mixture coats the back of the spoon. Remove from heat. Whisk until smooth if it is a bit lumpy. Place aside to cool. If I am in a hurry I put the bowl in a sink of cold water and stir it to cool quickly.
Once cool, stir cream through and chill in fridge for at least 2 hours, or overnight is even better.
Remove vanilla beans if you have used them and scrape the seeds from the beans into the mixture, discard pods.
Pour the custard into an ice cream maker and churn for about 30 minutes or until ice cream is firm.
I often serve it with a homemade caramel sauce if you are feeling really naughty 🙂 or lemon honey and greek yoghurt or Homemade Custard.
When you have chooks and they are laying copious quantities of eggs, its nice to do lots of homemade things with them knowing that you are making something entirely from scratch, using nutrient dense home-grown ingredients. I often make this custard with raw milk too, which is so much better for you than homogenised and pasturised shop bought milk. If you do know a dairy farmer, they are legally allowed to sell you up to 10 litres of milk (in New Zealand) at a time. Raw milk is beautiful to use to make custard, ice-cream, cheese, etc and everything tastes just that much creamier and wholesome.
You will need:
800 mls milk
3 tbsp sugar
1 tsp vanilla extract
Bring to the boil in a saucepan on the stove.
Meanwhile, into a shaker, add:
250 mls milk
1/4 – 1/3 cup cornflour (depending on how thick you want it)
4 egg yolks
Shake together and have ready to add to the milk just as it starts to boil. Reduce heat and stir quickly until it thickens. Remove immediately from heat once thickened as it catches and burns easily.
This is my husbands favorite dessert, so when the tamarillos are in season we have this often. The kids love it too. My favorite tamarillos to use are the red ones. They have more flavour and tartness than the Gold or Amber ones. Tamarillos are an excellent source of carotene and vitamins B6, C and E. They are a rich source of iron and a good source of fibre. No reason not to do lots with this very versatile fruit. Unless of course you live in an area where they don’t grow. When I was a student in Dunedin my fiance lived in Kerikeri, and he used to send me down boxes of tamarillos and kiwifruit. I thought it was christmas! He obviously knew the way to a poor fruit-deprived students heart 🙂
Red, Gold and Amber Tamarillos.
The recipe is really easy, basically a scone mixture made into pinwheels. It is easy to make into dairy-free, just substitute coconut oil or ghee instead of butter. And I have made it gluten-free before, by using a gluten-free flour mix. And the sauce that it makes is deeeeelicious!!! I could go on and on and on…..
So, on with the recipe.
Heat oven to 180 deg celsius on fanbake, or 200 deg celsius on conventional bake. Into baking dish place 1 1/2 cups boiling water and 1 cup sugar. Place in oven to keep hot. Prepare dough.
Dough:
1 1/2 cups flour (wheat or gluten-free)
2 tbsp sugar
2 tsp baking powder
1/3 cup milk (dairy or dairy-free eg. almond, rice etc)
90gm butter (or ghee or coconut oil)
Pinch salt.
Rub butter (or dairy-free alternatives) into flour, sugar, baking powder and salt. Mix with milk (or dairy-free alternative) into a stiff dough. I usually just chuck it all into my food processor. Roll out into an oblong aprox 1 cm thick.
1 cup tamarillo flesh – (cut tams in half, use a teaspoon to scoop out the flesh, and chop lightly into smaller pieces.)
Spread chopped tamarillos over the dough. Add some dots of butter or coconut oil to the fruit. Roll up from the long edge into a roll, lifting as you go so as to capture the fruit in the roll. Cut into slices about 4cm thick. To do this easily, I get a piece of cotton thread, slide it under the roll where you want to slice it. Bring each end of cotton up and over the top of the roll, crossing over each other at the top and keep pulling. This slices the roll neatly without squashing it like a knife does.
Place each slice in your dish of hot water/sugar mix. Add any leftover fruit around the slices in the dish.
In this picture I have doubled the recipe. If you do this, don’t double the amount of hot water, put in about 2 cups instead.
Bake for aprox 20 mins or until golden brown on the top. Let it sit and cool for a bit so that the sauce thickens.
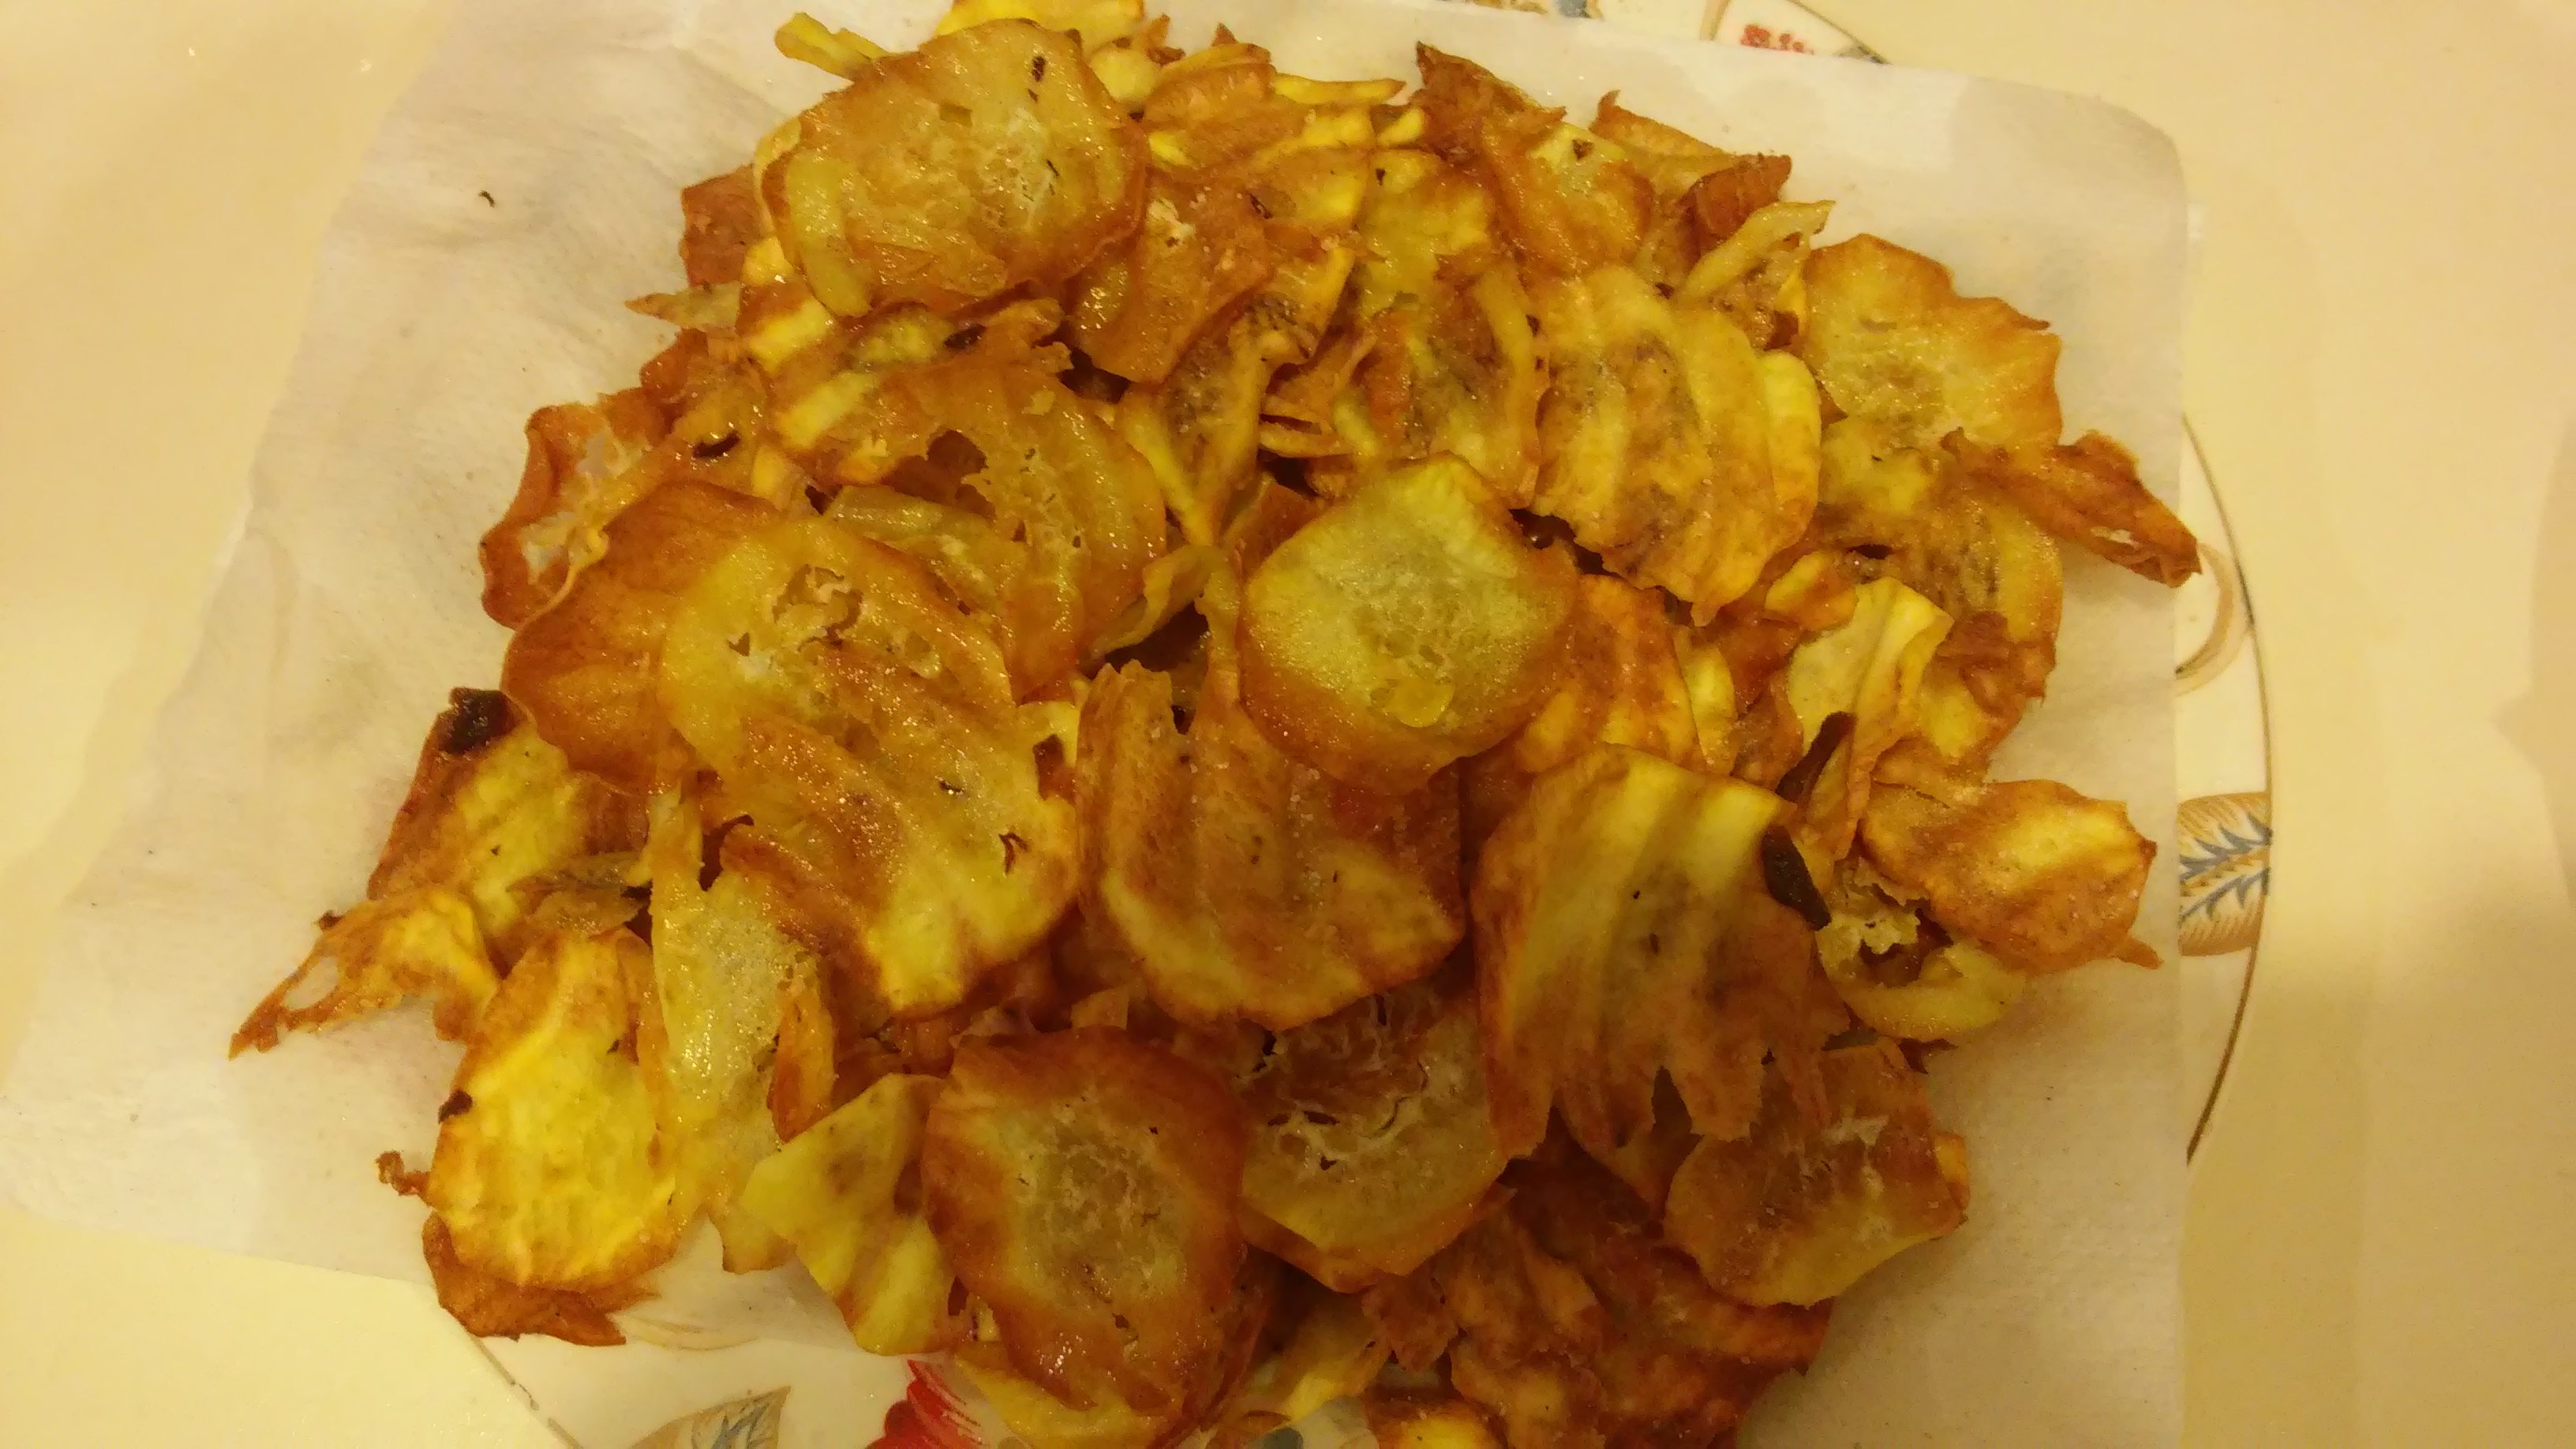
I accidentally discovered how to make kumara crisps one day. I just decided to have a go, and it worked. And they are really scrummy. In fact, you can’t stop eating them.
You will need:
Kumaras (obviously)
Coconut oil
Large fry pan.
Salt
Peel kumaras and slice very very thinly in your food processor. I have discovered the crinkle cut blade which makes a lovely thin slice. The trick is to have your processor on as fast as it will go, and don’t force the kumaras down into it, just let them go through at their own rate.
Heat up coconut oil in frypan, about medium heat. I have about a centimetre of oil in there so as to cover each slice.
When the oil is nice and hot, place slices in individually and only single layer across the pan. They should froth and bubble when you throw them in. (I know some people that do that :)).
Using a holy spoon (I believe the proper name is ‘runcible’) move them around in the oil until they are starting to look golden brown. Get them out quickly at this stage as they can easily over brown.
Place on a plate with a paper towel to absorb the oil. Put the next layer of slices in to the oil to cook. Sprinkle the cooked crisps with salt.
When finished, strain the oil through a sieve into a bowl, and once cool, keep in the fridge for next time. There will be a next time :0)
They will crisp up more as they cool, and are equally delicious hot or cold. Actually, I love them hot, so end up eating way more as I am cooking them than I ever intended to. Does that make me a bad person?